Introduction
Cascade is a content management system that allows editing of your profile. Faculty Profiles are only created upon request by either the faculty member or the department. To request a new Faculty Profile, please open a Service Desk Ticket. Faculty are responsible for keeping their profiles up-to-date. Once your profile shell is created you may use this tutorial to update your profile.
NOTE: Faculty will only have access to edit their own profile.
Topics
- Login to the Cascade to access your account
- Navigate to your Faculty Profile
- Update your Faculty Profile information
- Upload your Faculty Vitae
- Upload your Faculty Profile image
- Publish your Faculty Profile
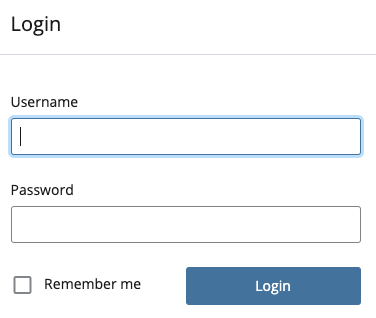
Login
- Login to Cascade
- Login with your NetID and Password
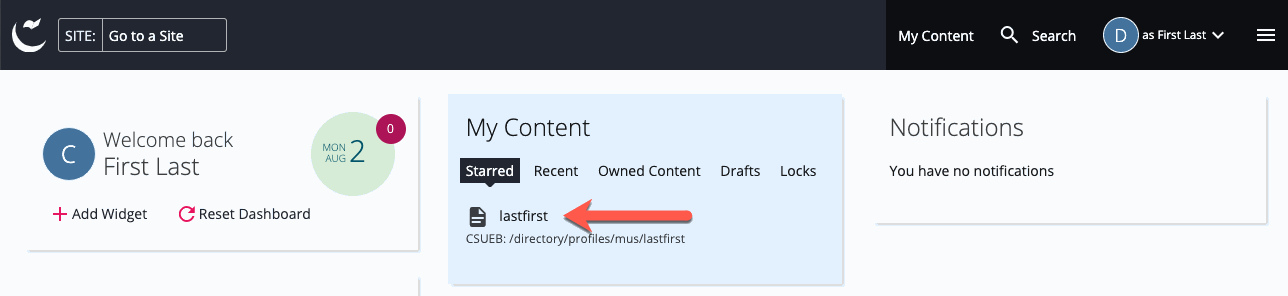
Navigate to your Faculty Profile
-
- In the My Content section, under the Starred tab, select your profile page.
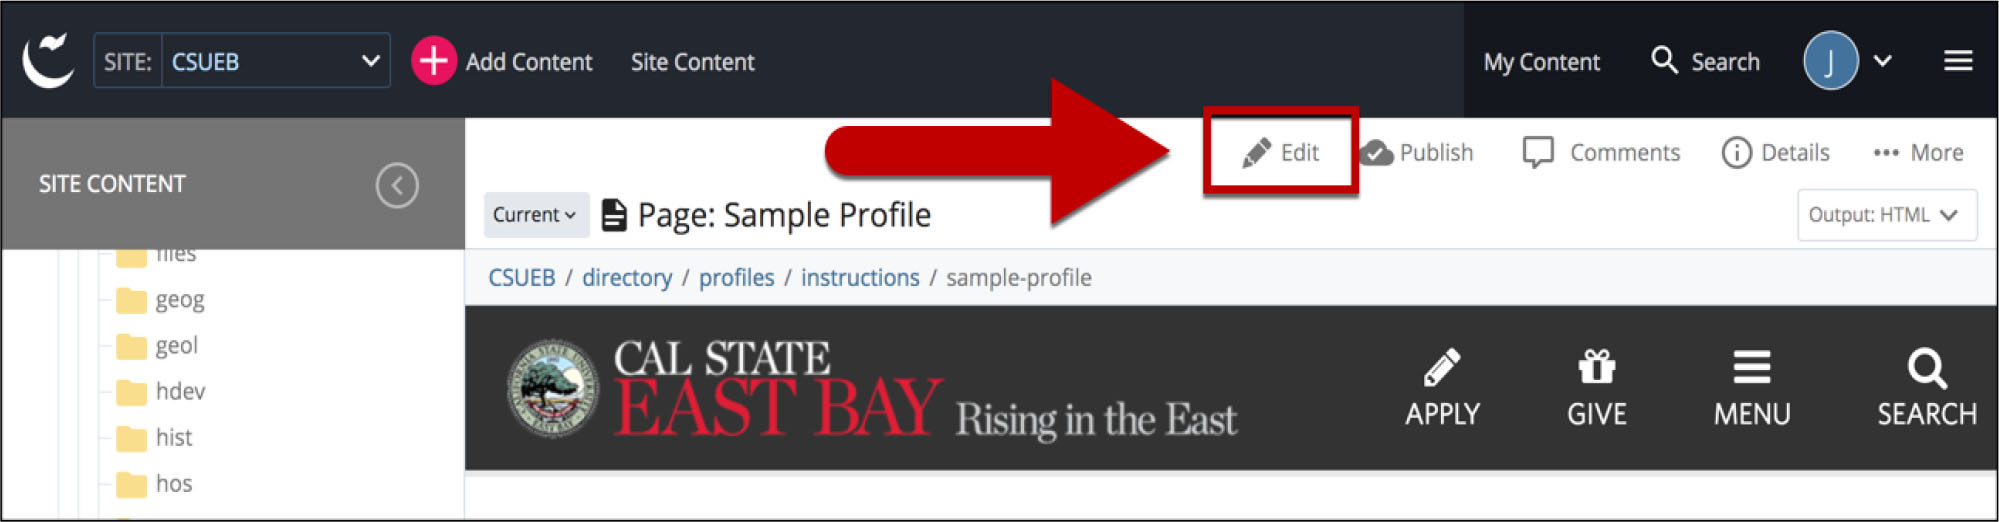
- To edit your Faculty Profile, select the Edit tab.
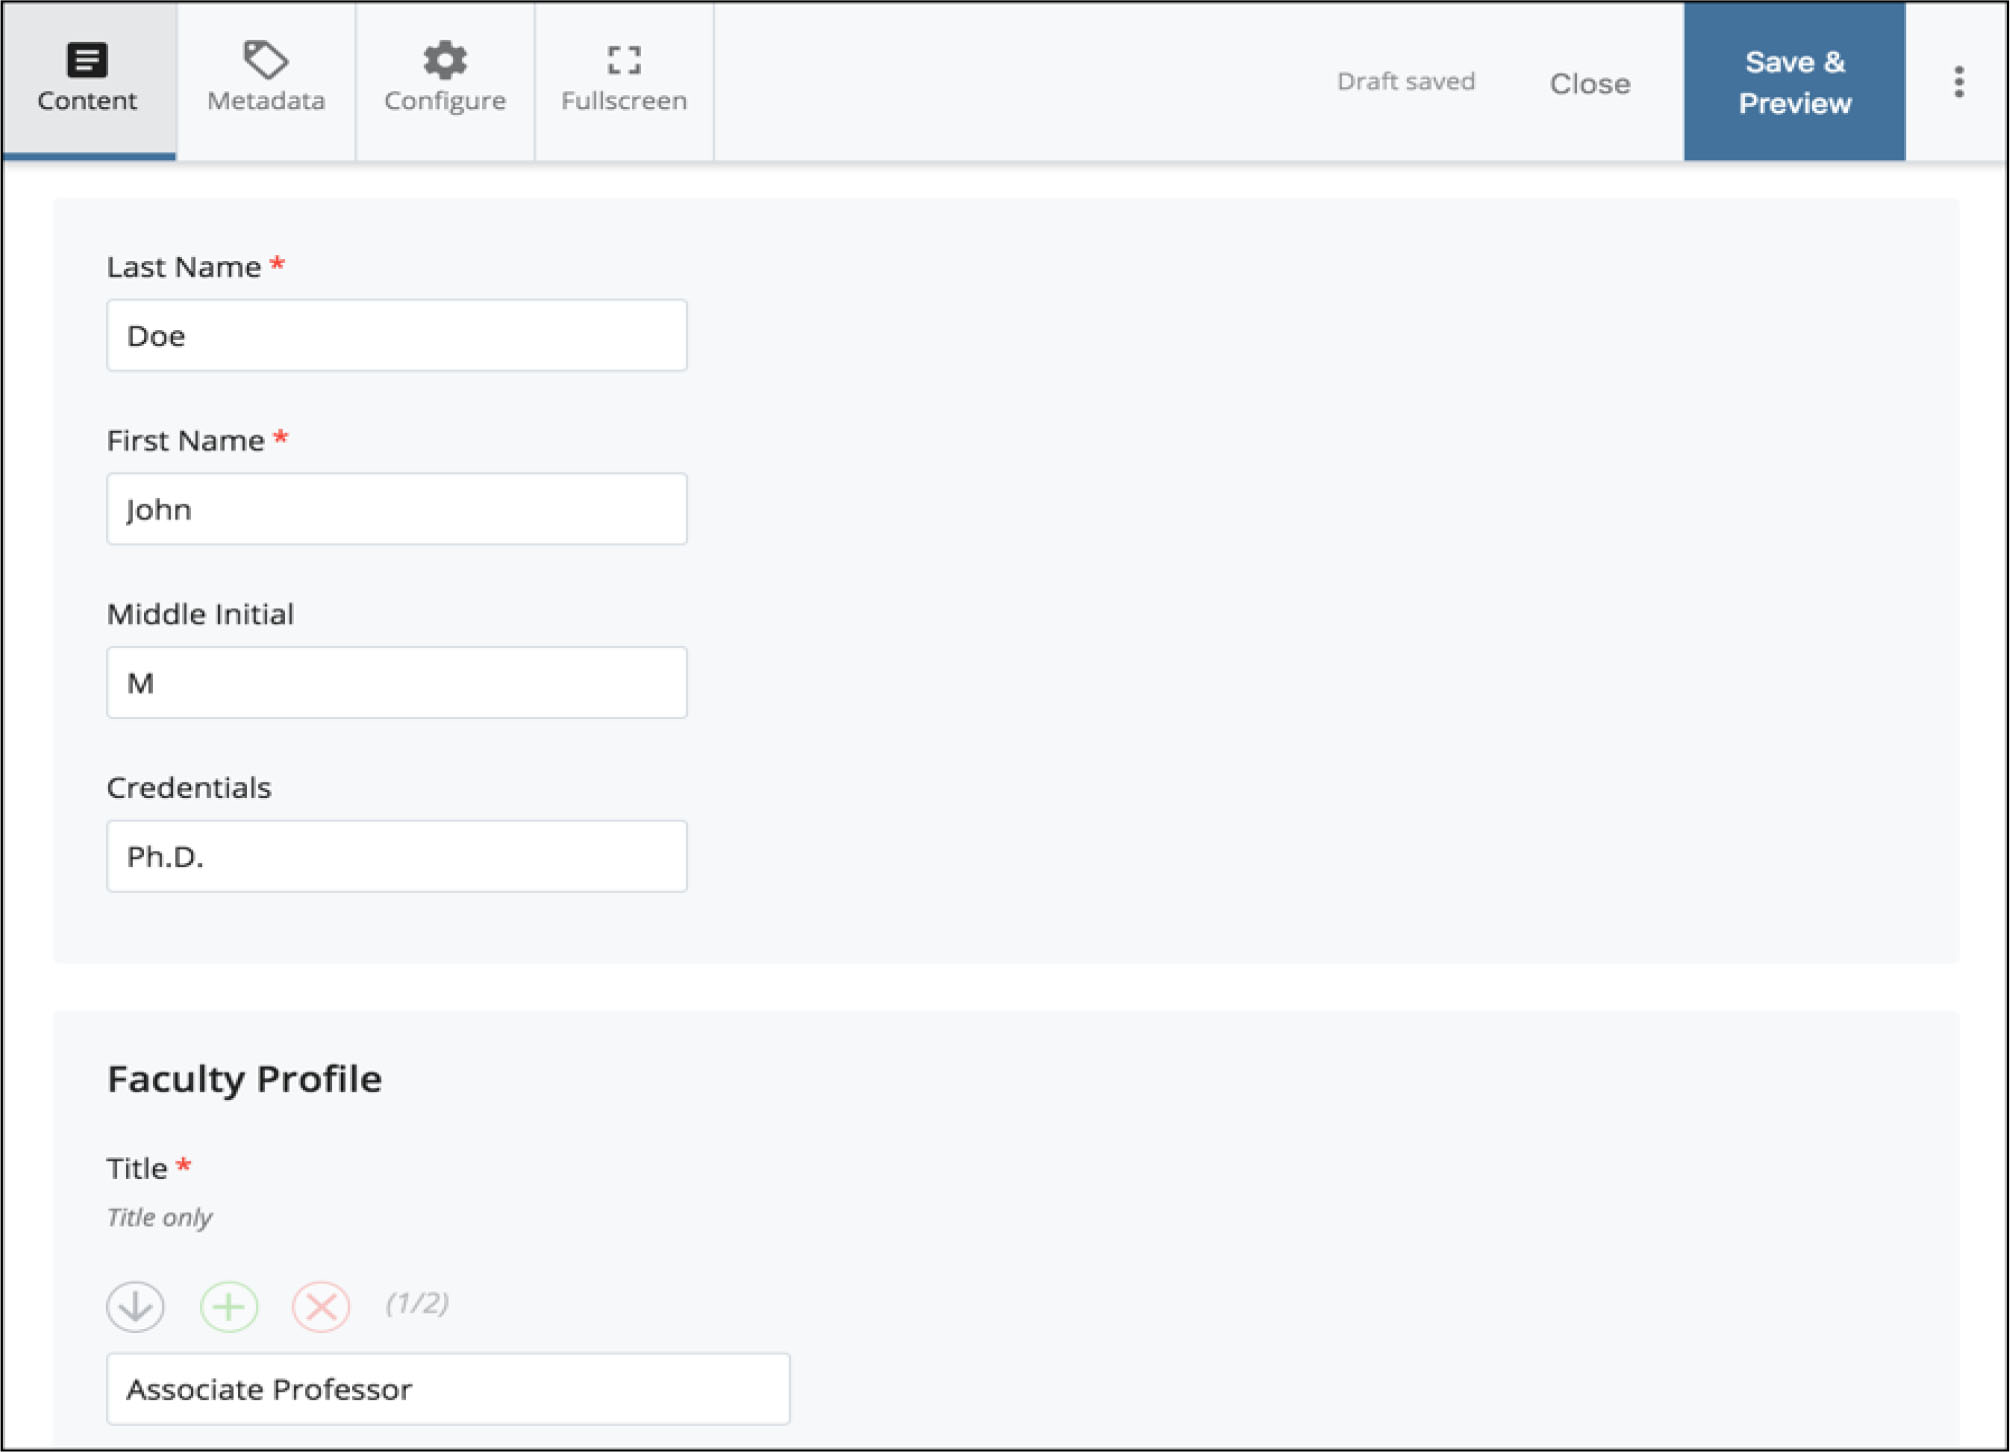
Update the Faculty Profile Information
- The Red Stars represent the required fields. Make sure all the required fields are correct.
Note: There will not be an option to input your courses as they are automatically populated.
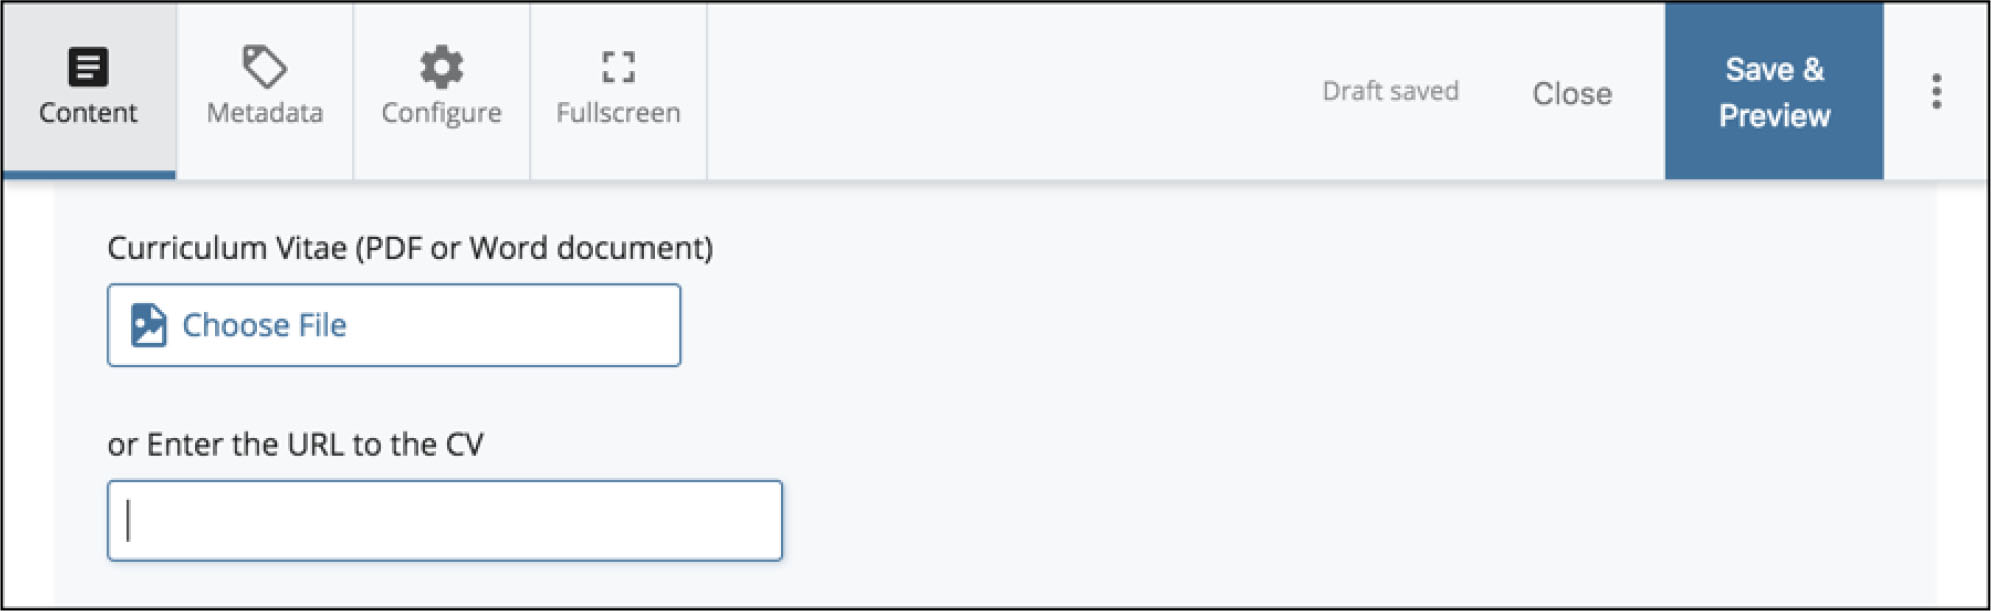
To Upload your Curriculum Vitae
Note: You must have an electronic version of your Curriculum Vitae in PDF or Word format to complete this step.
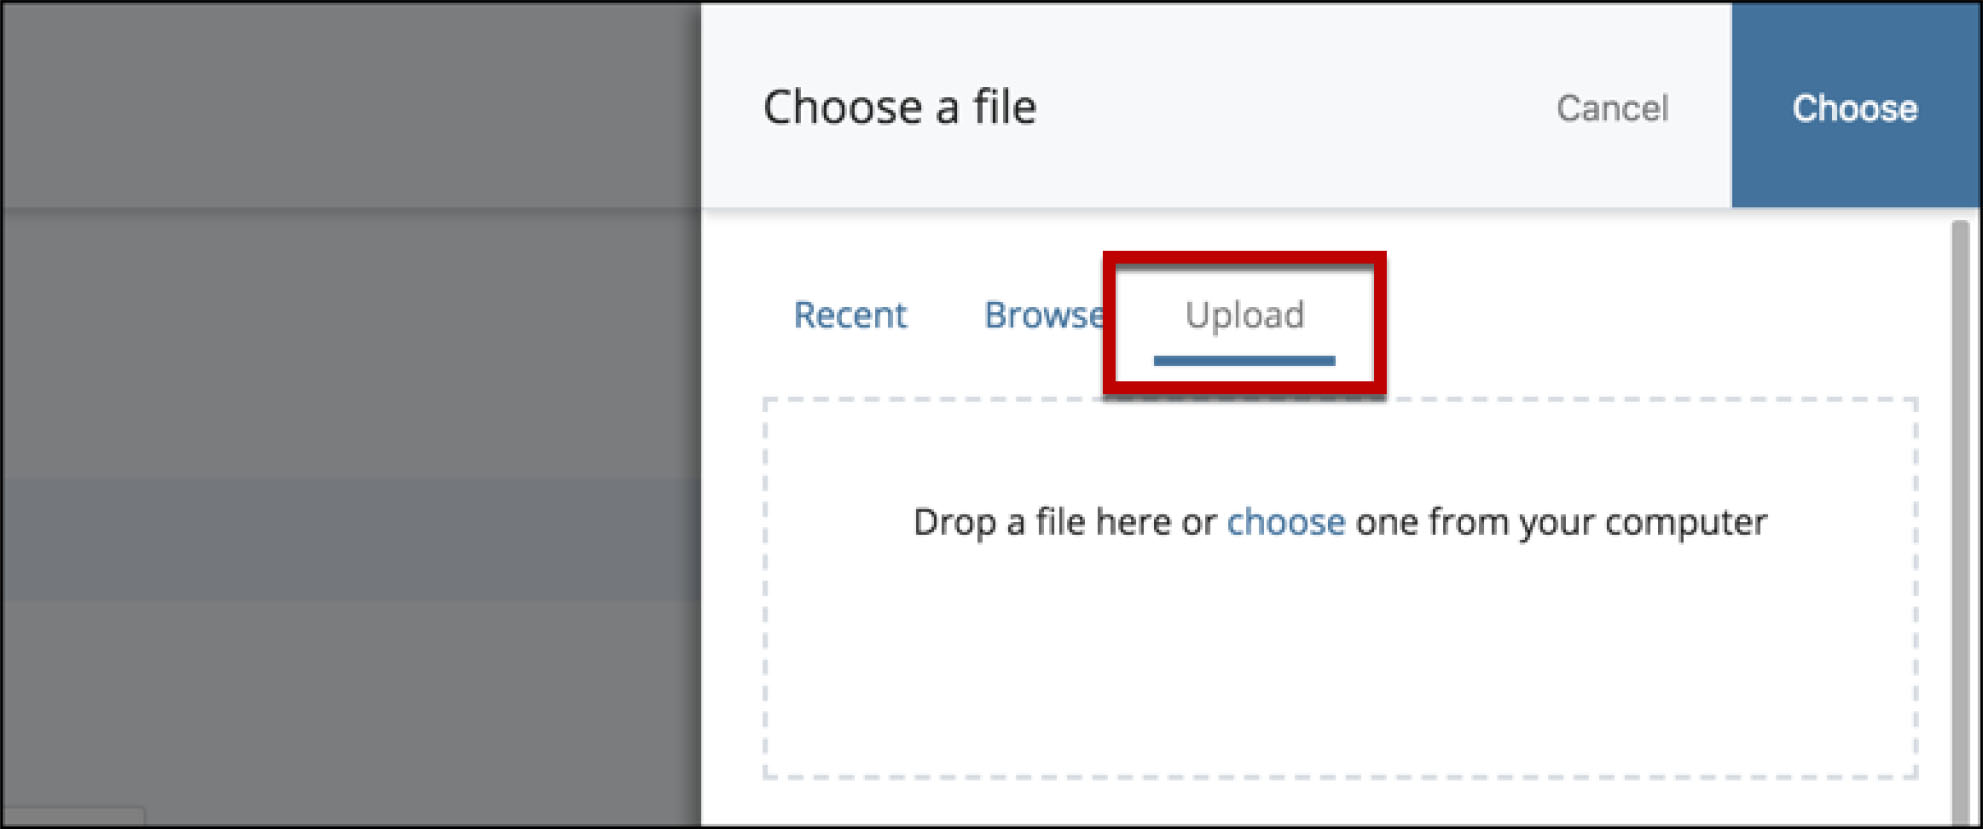
- To upload your Vitae, select Choose File.
- In the right navigation window, select the Upload tab
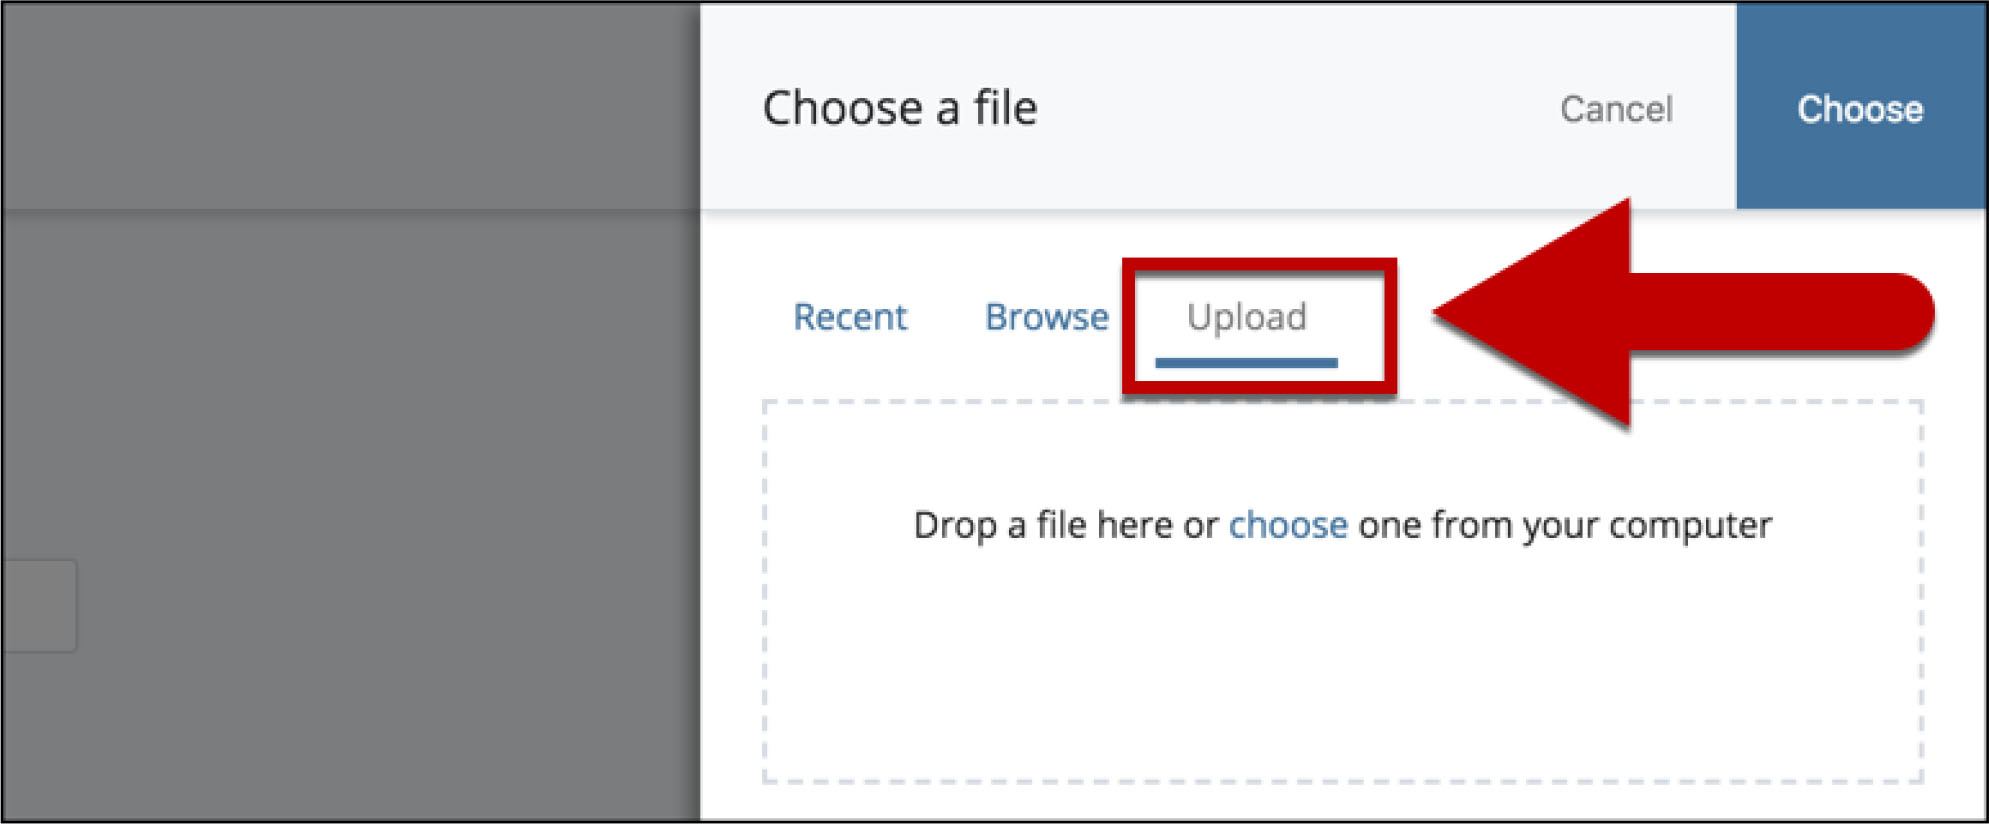
- Drag and drop your Vitae in the box select choose to browse for it on your local machine.
- To select a placement folder for you Vitae, select profile.
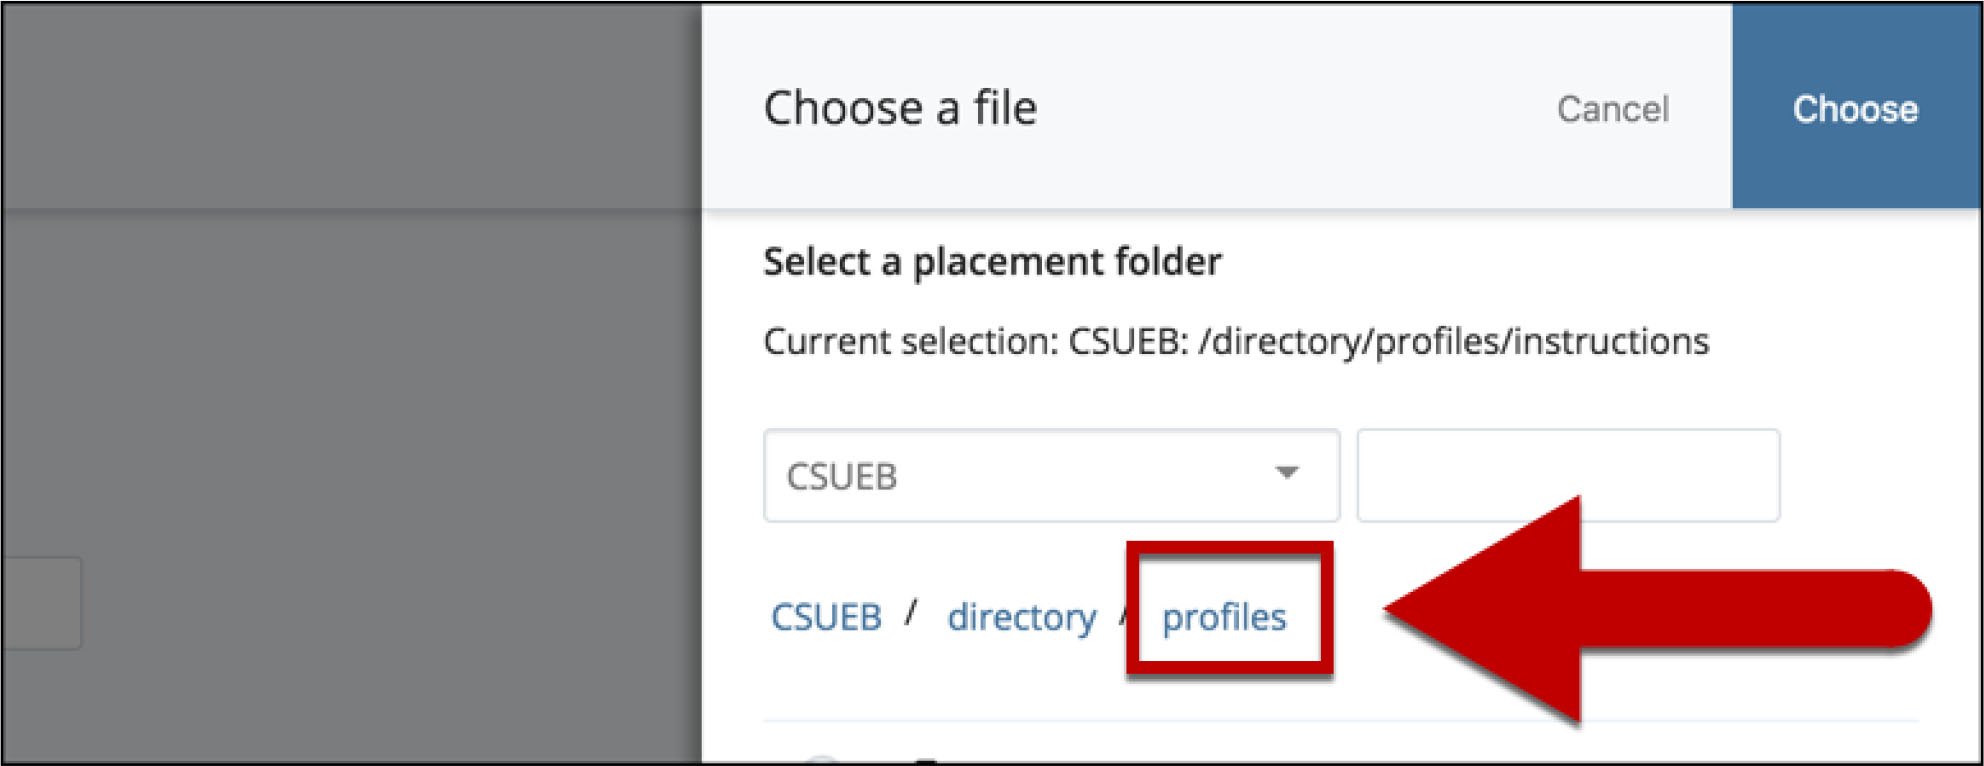
- Scroll to the bottom and select the last page
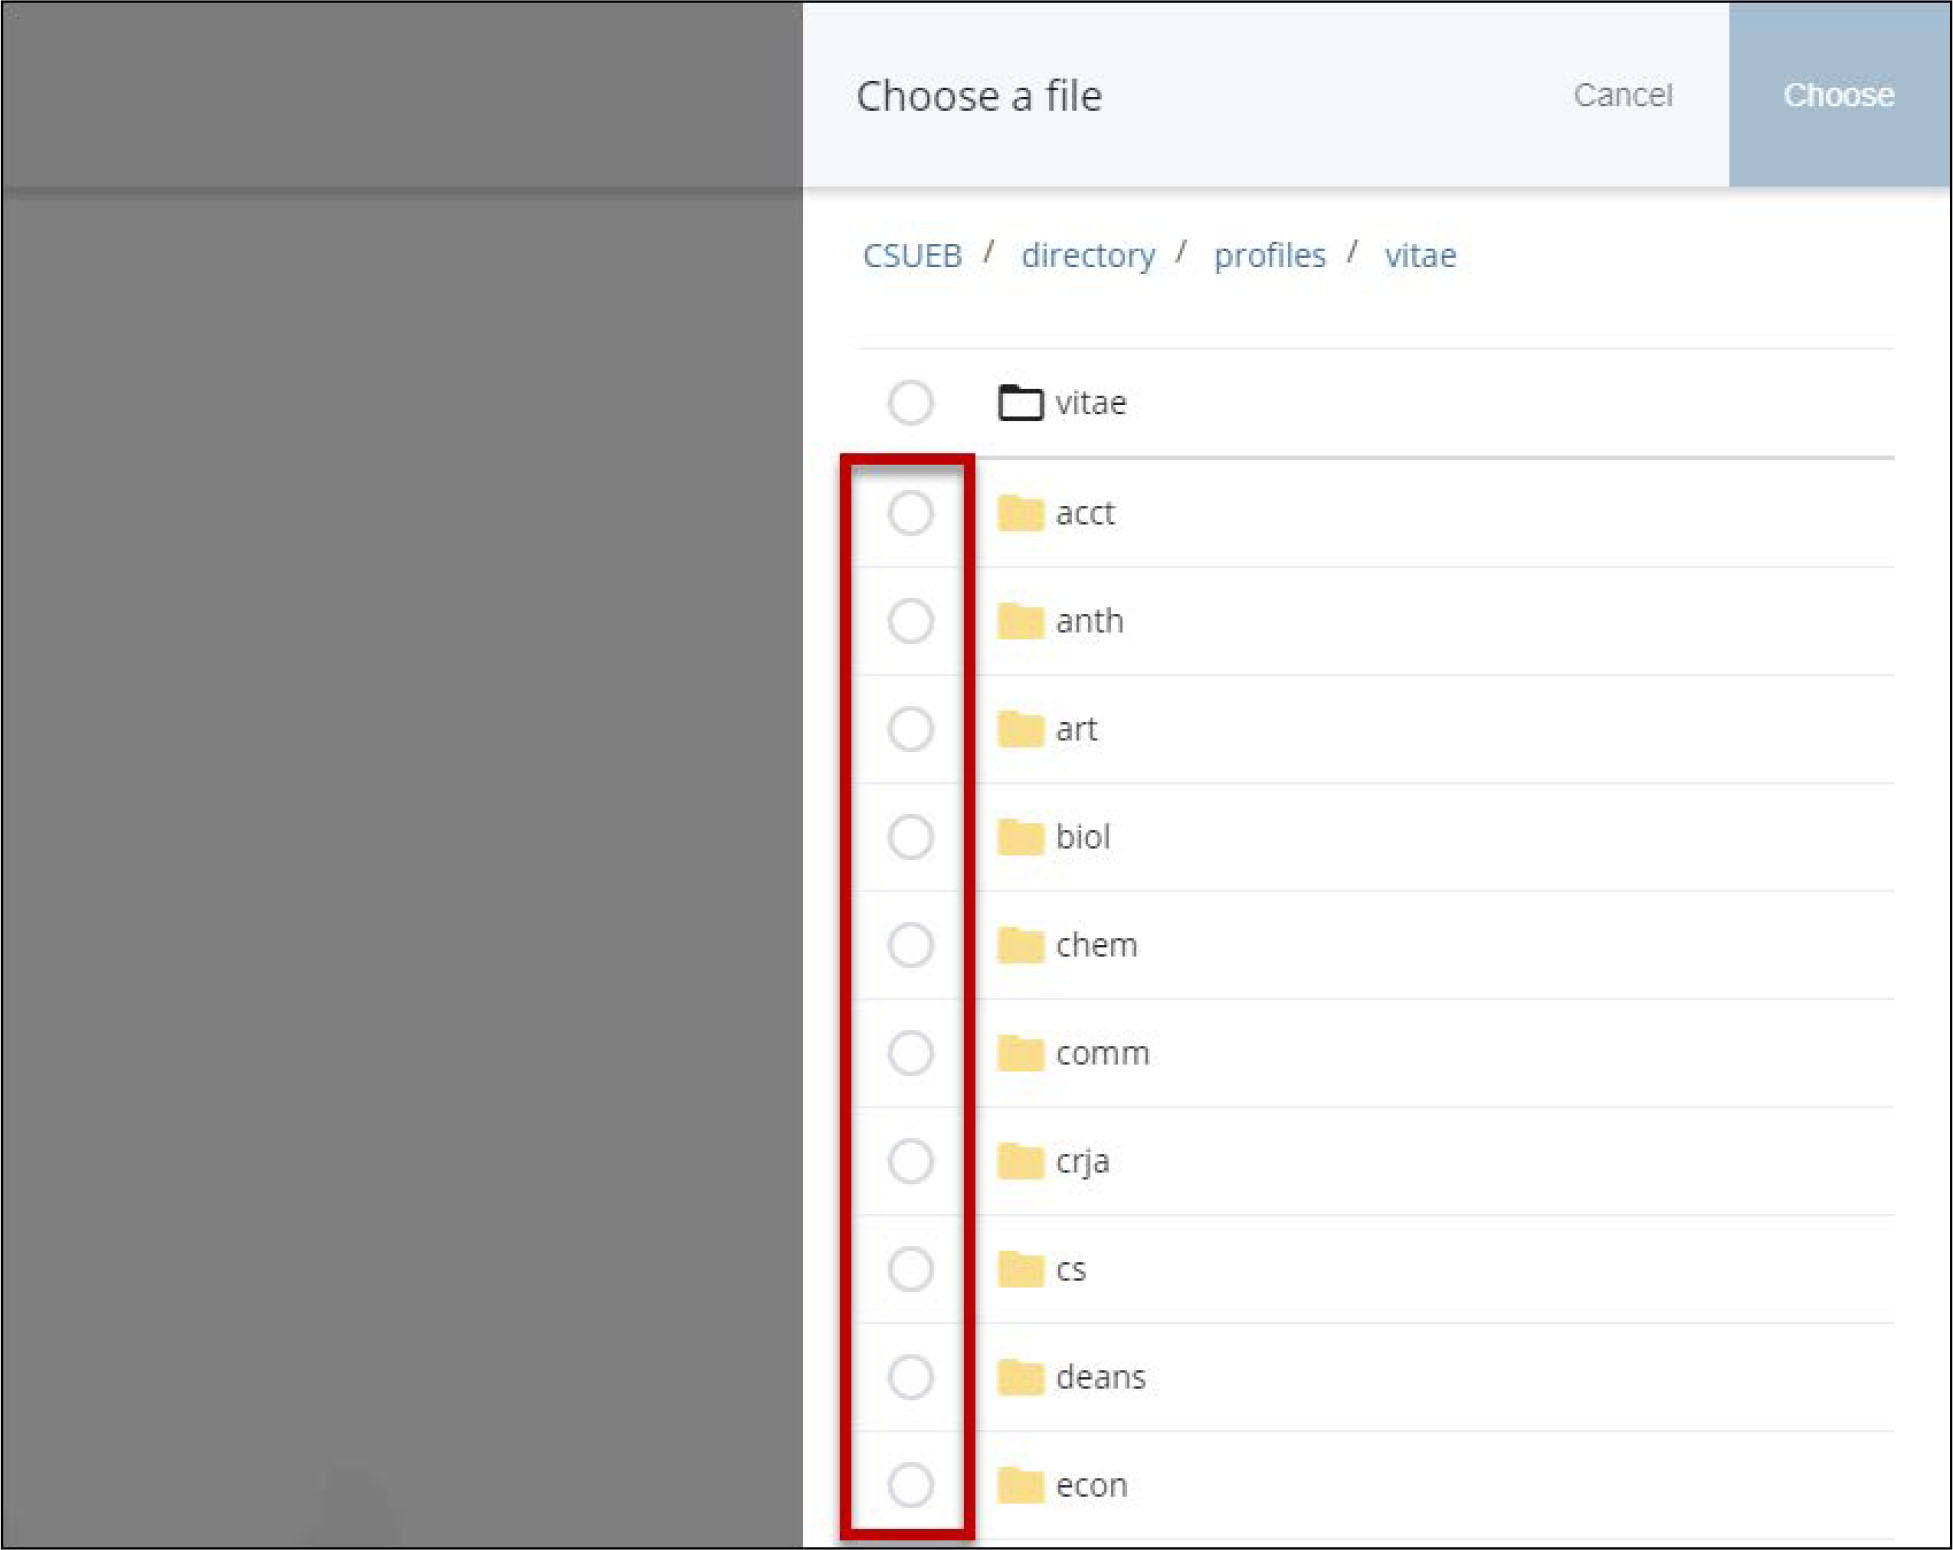
- Select the vitae folder
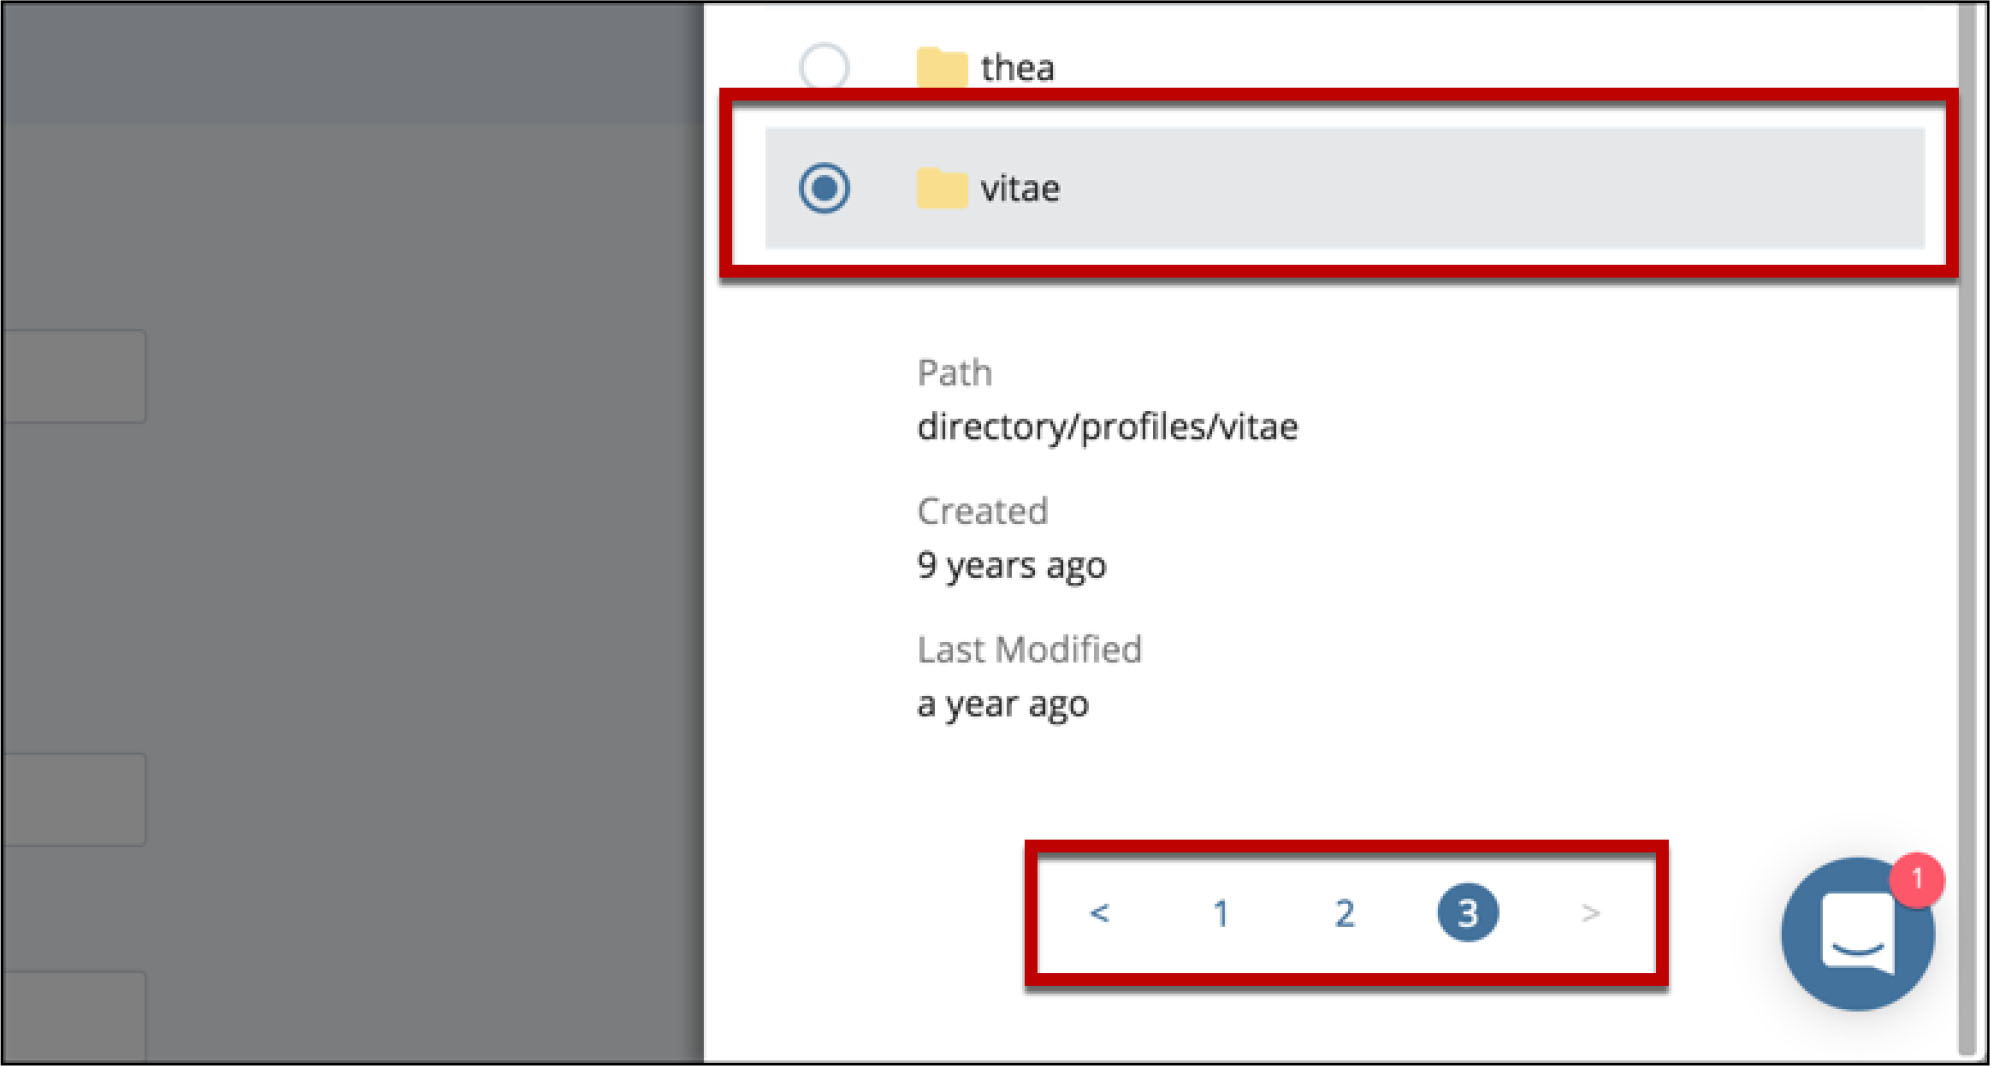
- Select your department's folder
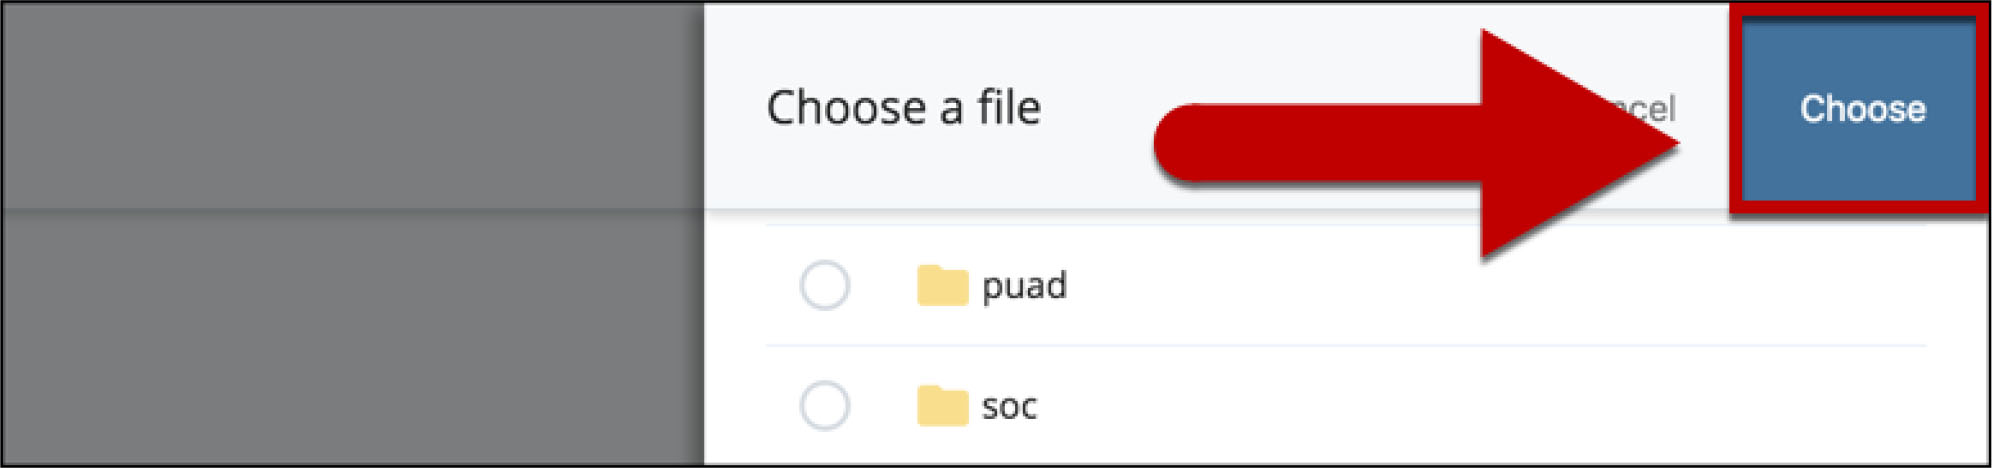
- Select Choose in the top right hand corner
- The vitae has successfully been added.
To Upload your Faculty Image
Note: Photos uploaded to the faculty profile pages must comply with local, state, and federal statutes, including but not limited to laws concerning decency, privacy, and copyright. Only portraits of faculty members will be accepted – logos, icons, avatars, and graphics are not acceptable.
Note: The profile image size should be 147w by 197h pixels.
- Select the Choose File button next to Profile Image

- Select the Upload Link
- Drag and drop you image in the box or
- Select choose to browse for the image on your local computer
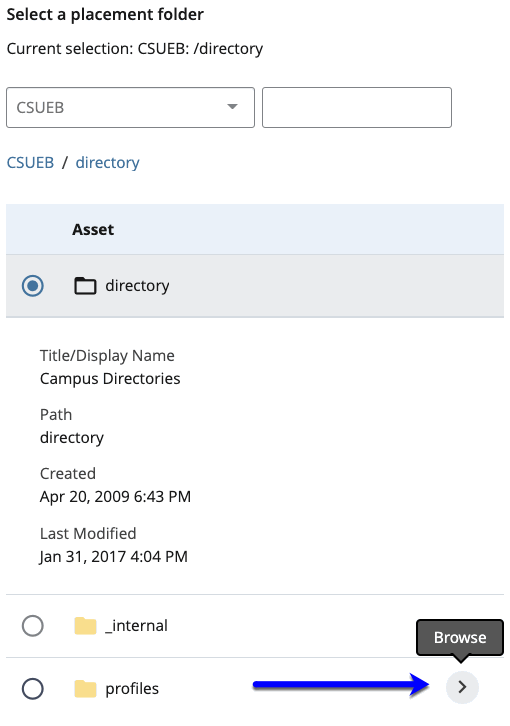
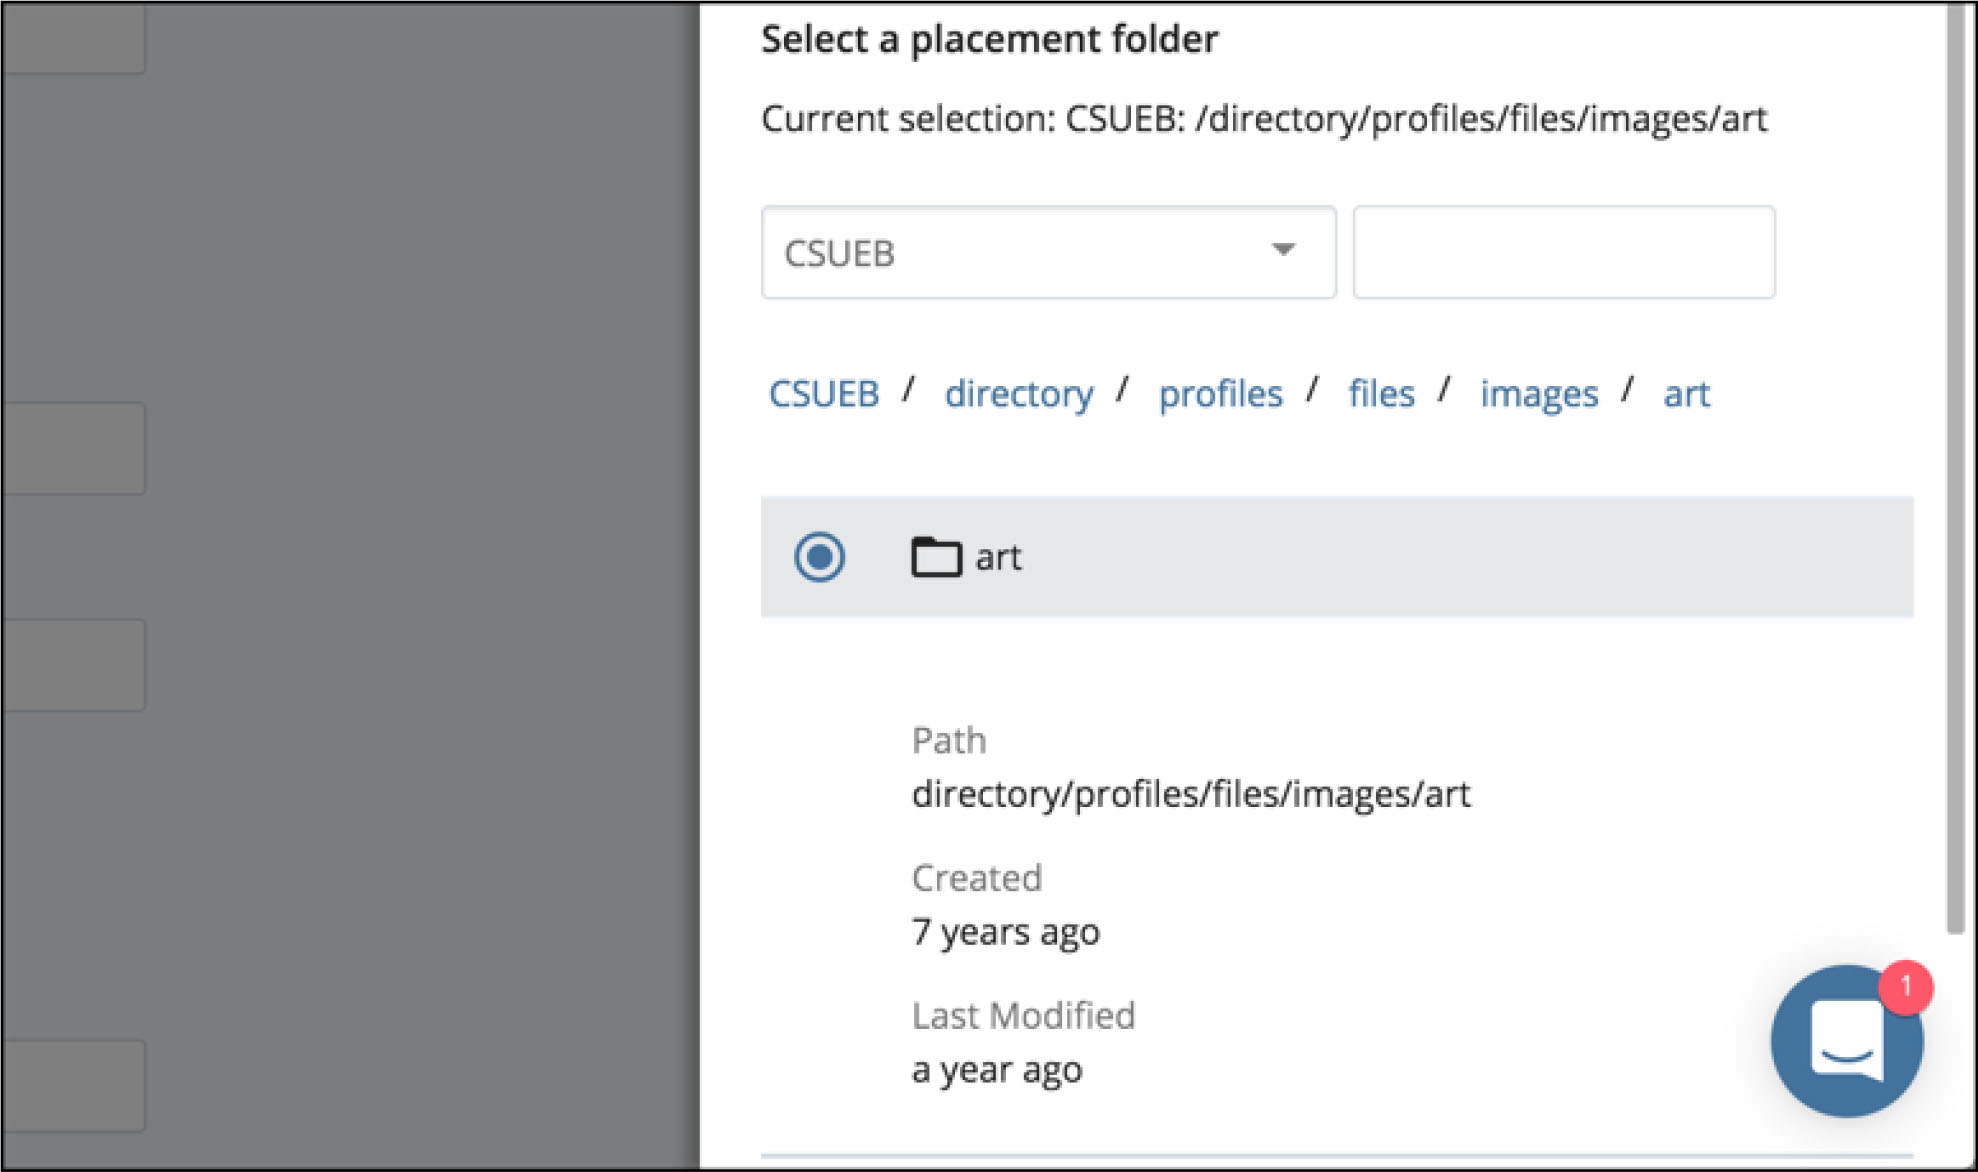
- Select the Browse > to the right of the profiles directory:
- Select files folder, (select the Browse > not the radio button)
- Select the image folder, (select the Browse > not the radio button)
- Select your department's folder, (yes, radio button this time)
note: unless you are uploading to CSUEB / directory / profiles / files / images / [your dept] as seen in the screenshot below, your profile image will not work!
- Select Choose in the upper right-hand corner
Publish your Faculty Profile
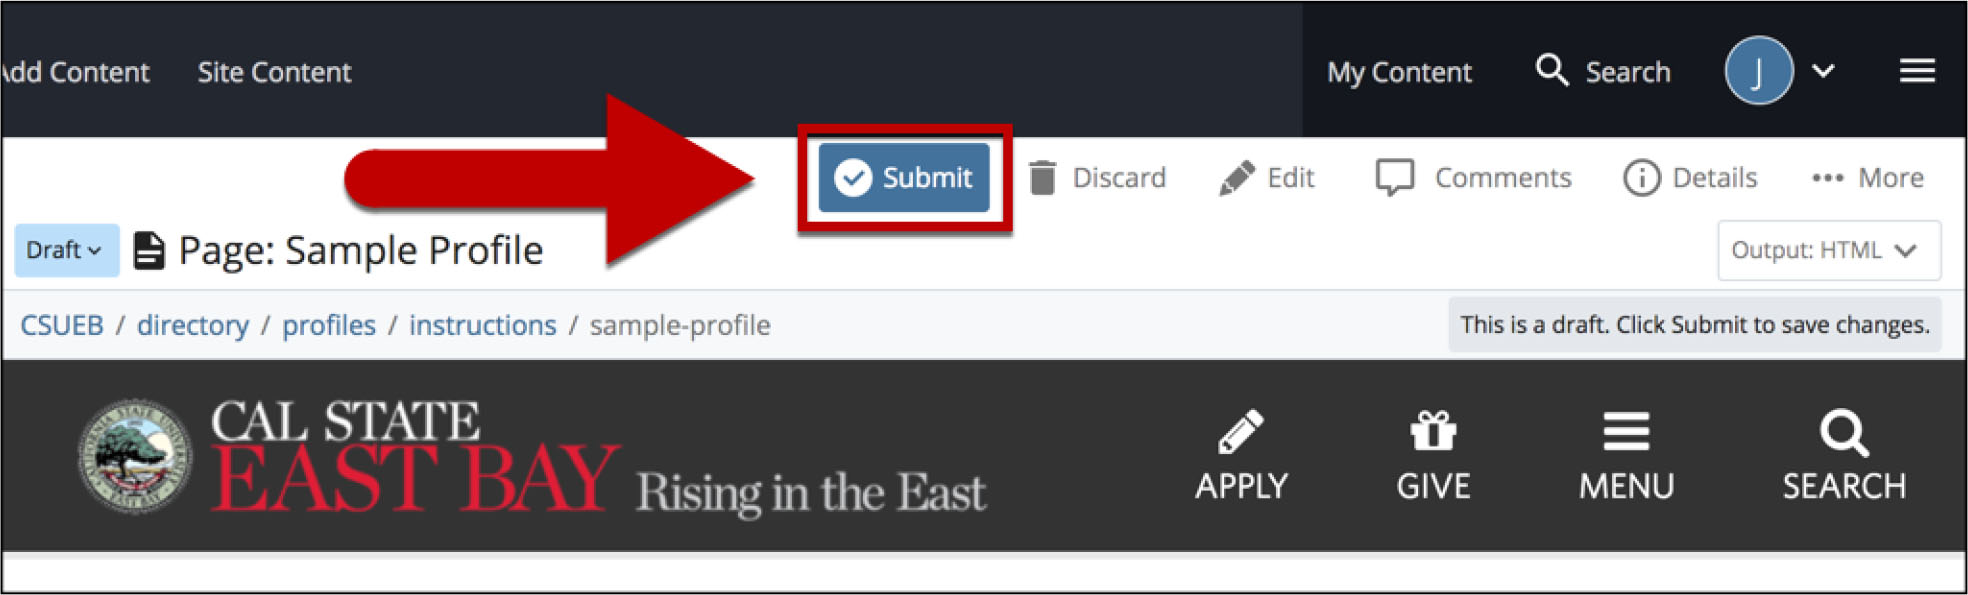
- Select Preview Draft

- After previewing what the page will look like, select Submit
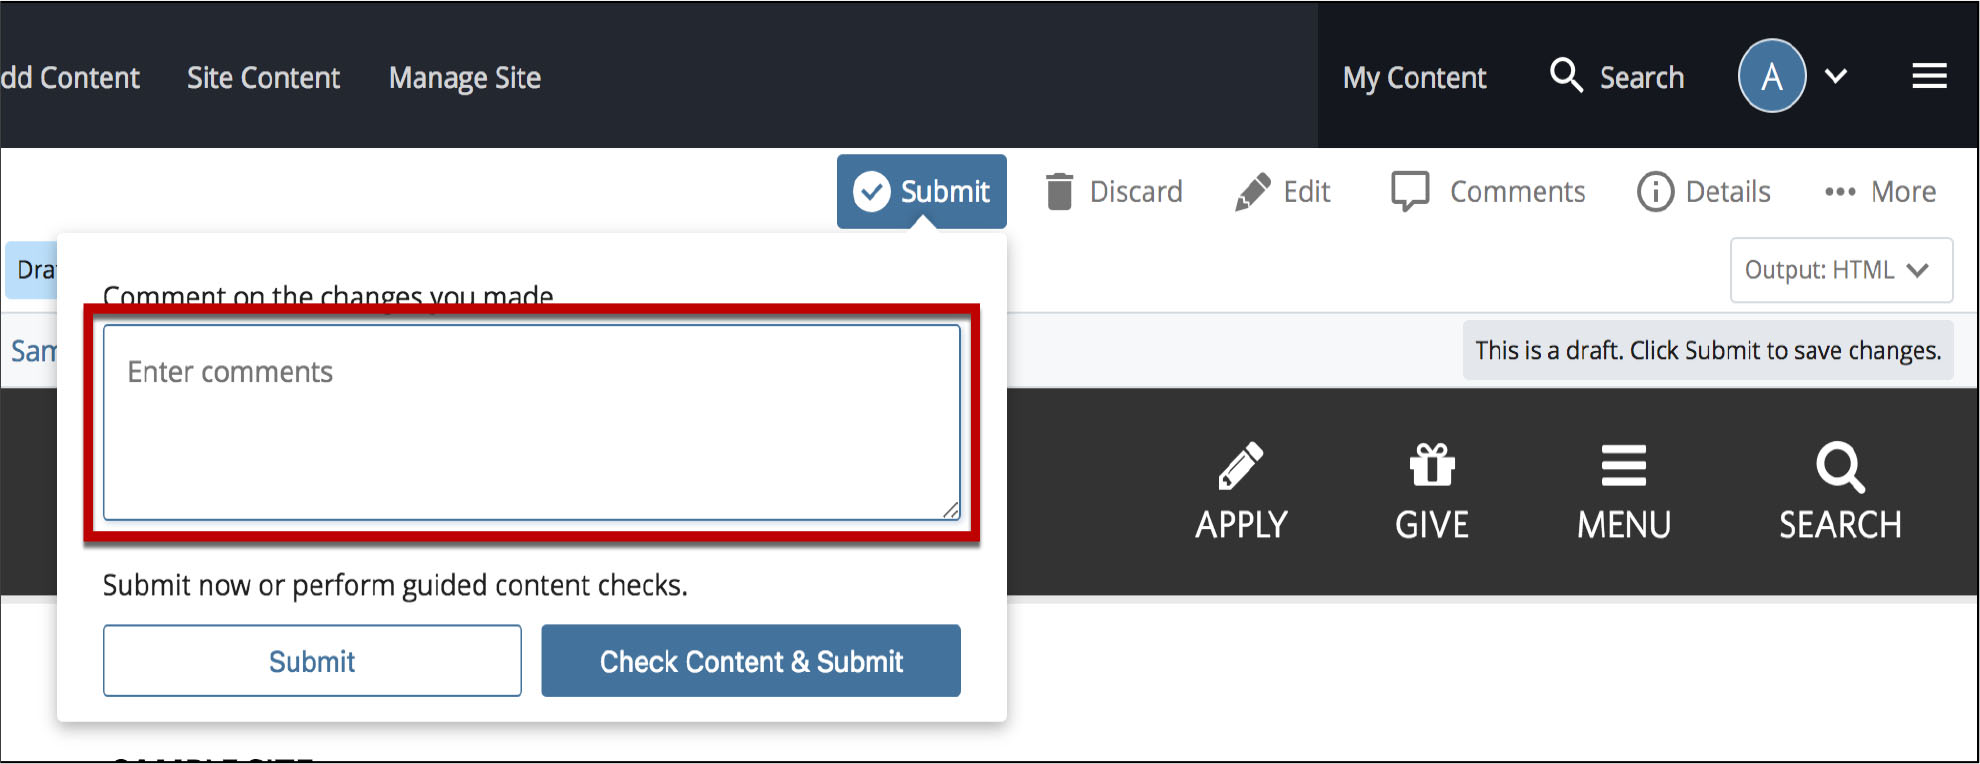
- Enter comments for changes made
- Select Check Content & Submit.
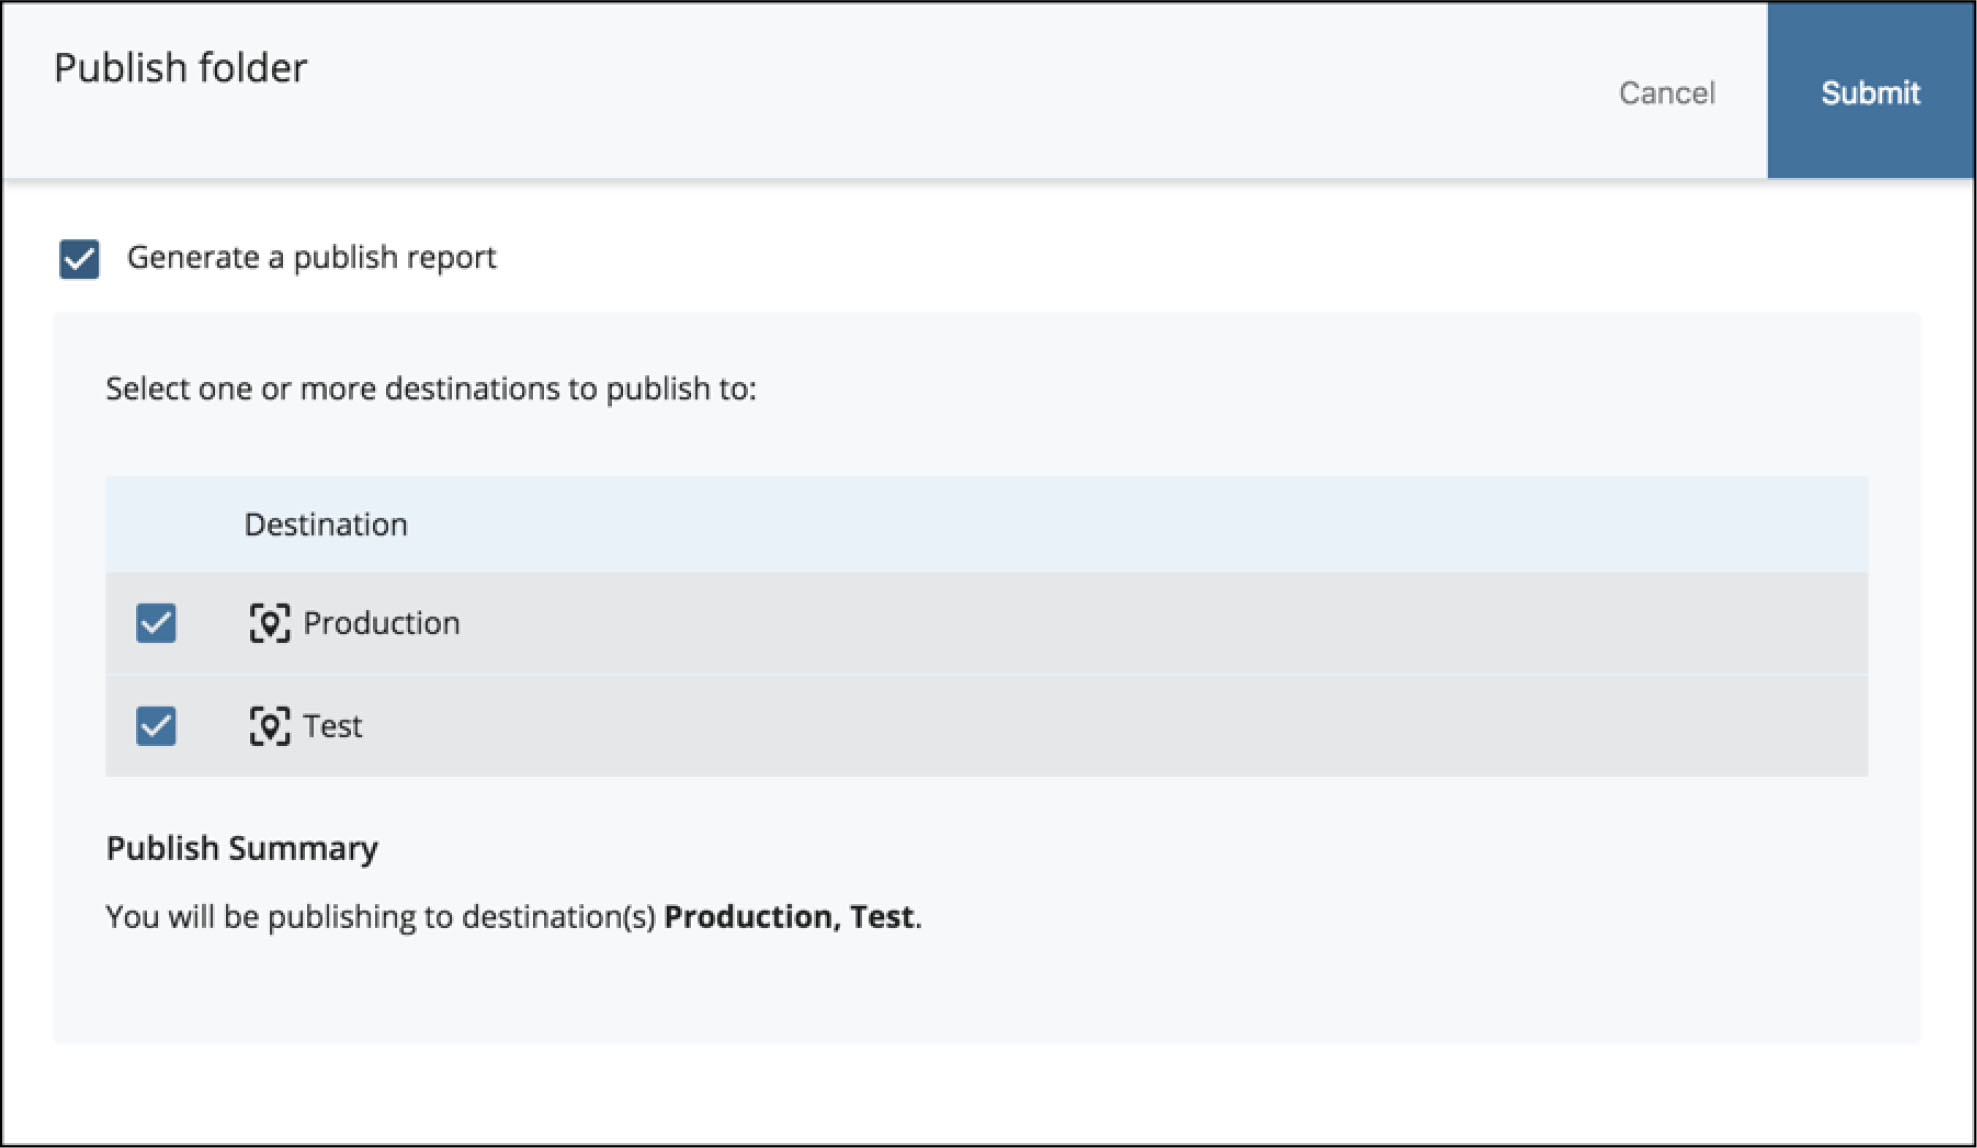
- After previewing what the page will look like, select Publish

- The default settings should have everything checked
- Select Submit
Congratulations! You have successfully updated and published your faculty profile!