
What is Adobe Acrobat Sign?
Adobe Acrobat Sign is the approved e-signature solution at Cal State East Bay (CSUEB). It allows faculty and staff to easily send, sign, track, and manage signature processes using a browser or mobile device.
What is it used for?
As part of CSUEB's digital transformation, this software is used for many university forms such as: invoice payment, check requests, employee evaluations, fee waivers and more.
The Basics
How to Log in (2 min.)
Access University Forms (7 min.)
Track Your Agreements (9 min.)
- Agreements in progress, view the audit report, send a reminder
Important Features Quick Tour (9 min.)
- Delegate to another, decline, replace a recipient, set auto delegate
Adobe Sign Groups Quick Tour (8 min.)
- What are Groups and how do I create one? How do I add members to a group? How do I share documents to my group?
Templates
Create & send a reusable document (5 min. version) | 38 min. in-depth version *requires a Workflow (see below)
Send a document for "one time" collection of signatures (2 min.)
Send a document for your own signature only (3 min.)
Send a document in bulk (3 min.)
Workflows
Create a Workflow (7 min.) *Requires a reusable template, see above
Request Access to Create Workflows (Group Admin access)
-
Issue: I would like to share what's in my queue with someone else, or I would like someone to share their account with me so I can help manage their queue.
Explanation: Adobe Sign allows account sharing, however, it is "view only" and you will not be able to act directly on behalf of the user whose account you are viewing. This is helpful when you are managing a transition or separation from a staff member in your area.
Solution:
Step 1: In Adobe Sign, select the profile icon on the right-hand side. Then, select your name/email address.
Step 2: Select Personal Preferences.
Step 3: Under Personal Preferences, select "Sharing Status".
Step 4: You will see a split window with "My Account Shared" and "Shared with Me". To share your account, choose "My Account Shared With". To request to view someone else's account, click the "Shared with Me" window.
Step 5: Click the + (plus) icon, and enter the email address of the person you want to share your account with or send a request to have someone share their account with you.
To view the shared account, refresh your browser tab, Go to the profile icon again, and select "Switch Account". Remember it is a "View only" account - no signatures or approvals can be made through the shared account.

-
Issue: Adobe Sign is not loading, the screen is freezing, or an error message appears suddenly.
Explanation: This is usually a temporary issue with the WiFi connectivity, email browser, or recent update.
Solution: You may check the Adobe Document Cloud System Status to see if there is a mass outage. If not, you can try a different web browser. You can also check your WiFi connection. If the issue persists, open a Service Desk ticket and include a screenshot of the issue.
-
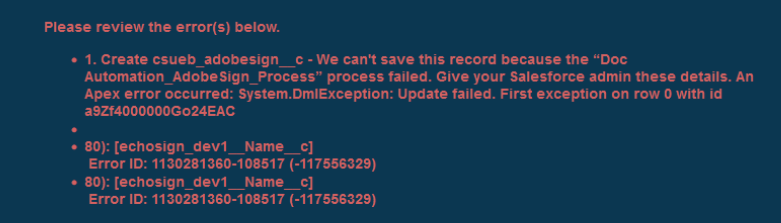
Issue: Receive "Agreement Already Modified - The agreement is already modified, Please reload the page to perform any changes on this agreement" message when attempting to use a workflow.
Explanation: This is usually a technical issue that occurs within Adobe Sign at times.
Solution: Submit a Service Desk Ticket. Per Adobe Support, an Adobe Sign Administrator must duplicate the Workflow and Template so that the user can access the workflow.
-
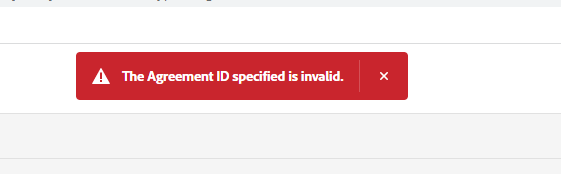
Issue: Adobe Sign displays an "The Agreement ID specified is invalid" message when asked to sign documents in your account.
Explanation: This is a technical error that may be related to a recent email address or Adobe account change.
Solution: First, go to www.adobe.com and login with your university email address. Go to your Profile and ensure your name and email address are correct. If the issue persists, submit a Service Desk ticket as the solution may vary. Include a screenshot to help us troubleshoot.
-
Issue: Unable to submit a Change of Grade form due to a persistent error message that appears once the form is filled out.
Explanation: This message usually appears when an incorrect student NetID has been entered.
Solution: Review the student NetID that was entered to ensure it was entered correctly. Copy and paste the NetID directly from the source to avoid typing errors.

-
Issue: Unable to submit a Periodic Evaluation of Temporary Faculty form due to a persistent error message that appears once the form is filled out.
Explanation: This message usually appears when the Department Name has too many characters (too long). The reason is that the Dept Name ends up being part of the file name. If the file name exceeds 80 characters, it errors out. The file name is made up of the last name, netID, EMPLID, form name and department name.
Solution: Shorten the Department Name (use acronyms) to avoid the error message. If the issue persists, open a Service Desk ticket and include a screenshot of the issue.
-
Issue: "This does not appear to be a valid email address" error displays after entering an email address in one of the fields on the form.
Explanation: It is likely that there is a blank space before or after the email address in the field.
Solution: Delete all characters in the field and copy/paste the email address or type it in again, ensuring you do not press the spacebar key so that there are no blank spaces in the field.
-
Issue: Cannot sign into Adobe:"An error occurred - SAML Response does not have Success status code. Please check the saml2p:Status element."
Explanation: The user may have selected "Personal" account instead of "Company or School Account".
Solution: When signing into Adobe, please select "Continue with Google" and login with your @csueastbay.edu email account. If the issue persists, open a Service Desk ticket and include a screenshot of the issue.
-
Issue: Adobe Sign displays an "Network error when attempting to fetch resource" message when viewing completed documents in your account.
Explanation: This is a technical error that may be related to a connectivity or Adobe-specific issue.
Solution: First, log in to Adobe Sign with a different browser. If the issue persists, open a Service Desk ticket and include a screenshot of the issue.

-
Issue: Adobe Sign displays a "You are currently signed in as [email 1]. This agreeement was sent to [email 2] for signature. Do you want to view this agreement as [email 1]?" message when asked to sign documents in your account.
Explanation: This is a technical error that occurs when you are authenticated into two different email accounts that you manage and Adobe Sign doesn't know which one you want to use to act on the agreement.
Solution:
1. Click "No, sign out and view agreement as [email 2]"2. You will be taken to a login window. Do not sign in when prompted. Instead, close the Adobe Sign window and go back to your email.3. Click on the link (blue button) in your email again. This time it should open up the agreement for you.4. If it doesn't, right-click on the blue button in the email and select 'Open in Private Window" or "Open in Icognito window".
-
Issue: When sending a document for multiple signatures, my approvers are getting the wrong fields to sign.
Explanation: The fields are assigned incorrectly in the Template. Edit the template to re-assign the fields.
Solution: Go to the Manage menu > Templates > Find the template that is associated with your workflow and click "Edit Template". Adobe Sign offers a variety of participants (Prefill, Signer, Anyone, Participant 1, etc.). A common source of confusion is that the "Prefill" participant is the same as Participant 1.
- If you are using the Sender Prefill option, then do NOT use Participant 1, and instead skip to Participant 2 for the next approver. (There will be no fields with Participant 1). Review the "How to create a reusable template in-depth video" to learn how to do this (Start at minute 06:25).
- If not using Sender Prefill, ensure the fields are assigned distinctly starting with Participant 1, Participant 2, Participant 3, etc. Review the color coding of each field to ensure all fields are assigned to distinct approvers. Review the "How to create a reusable template in-depth video" to learn how to do this (Start at minute 06:25).
-
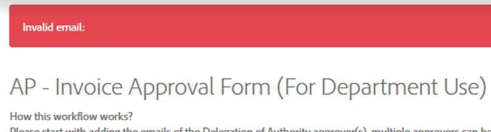
Issue: Adobe Sign displays an "Invalid Email message when sending a workflow.
Explanation: This is a technical error that can be cleared up by restarting the workflow.
Solution: To clear the error message, go back to the Home menu or hit the Refresh button to launch the workflow again.
-
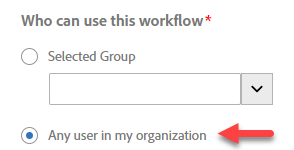
Issue: I created a workflow but can only share it with my Group. I don't see any option to share it to the entire university community like I can with templates.
Explanation: Adobe Sign restricts Workflow sharing with different Groups / Organization.
Solution: Submit a Service Desk ticket with the exact title of the Workflow you want to publish to all. Ensure the Template is already shared with all.
-
Issue 1: I created a workflow and need to update the routing. However, I am unable to "edit" the Workflow. If you are able to update the workflow, go to the instructions in Issue 2, below.
Explanation 1: Adobe Sign restricts Workflow editing when the Workflow has been shared with "Any user in my organization". If the Workflow is shared only with your Group, go to Solution 2, below.
Solution 1: Submit a Service Desk ticket with the exact title of the Workflow you want to make changes to, and the changes you'd like to make. Be very specific as to which field you want to update and the exact text or email address. Alternatively, the Account Admin can un-share the Workflow with all users after which you will be able to update the approval routing and make other changes. Let the Account Admin know when the changes are complete and they can publish the Workflow to all users again.
Issue 2: I created a workflow and need to update the routing. I have access but I don't know what to do.Explanation 2: As a Group Admin, you have access to edit the Workflows that are shared with your Group.
Solution 2: Go to Workflows > Custom Workflows > Search for the Workflow Name > Open the Workflow > scroll down to the CC field OR to "Recipients" section OR wherever you need to make the change > Make your edits > Select "Update" and close the workflow.
-
Issue: I created a workflow and when I attach the template I get an error message: "This document template has inconsistent access scope for this workflow. Please click edit scope to adjust the document scope to an appropriate level."
Explanation: The sharing permission of the Workflow and the sharing permission of the Template are inconsistent. Once you update the sharing for the Template, it will work.
Solution: Save your Workflow without attaching the template. Go to the Manage menu and find the template. Click Edit template to update the sharing settings. If you are sharing to a Group, update permissions to "Any user in my group." If you would like to share with all, update permissions to "Any user in my organization". After saving the changes, go back to the workfow and attempt to attach the template once more. To share the workflow to all, submit a service desk ticket.
