MyCSUEB Help
Student Help
Logging into MyCSUEB requires your personal NetID and password.
- New Students: Activate your NetID at www.csueastbay.edu/netid using the activation code in your letter of admission. To receive another copy of your letter of admission, contact (510) 885-2784 or admissions@csueastbay.edu.
- Current Students: If your NetID password is not working, reset it at www.csueastbay.edu/netid. If you believe your NetID and password are correct, contact (510) 885-2784 or reg@csueastbay.edu for assistance.
How does MyCSUEB work with Blackboard?
- MyCSUEB is a separate system and is not linked to Blackboard. When you use Blackboard you will need to login as normal.
When is MyCSUEB available?
- MyCSUEB is available 24 hours a day and seven days a week. There will be a short window of "down time" for system maintenance each night similar to Blackboard.
Why do I have two address options in MyCSUEB?
- Cal State East Bay allows you to indicate two address types. Your mailing address is where your bills, financial aid correspondence, and enrollment communications will be sent. Your home/permanent address is where your diploma will be sent.
How do I change my address?
- To change your current address, locate the address that you would like to update and click on the Change Address link. Update the information and click Save.
What is a To Do Lists?
- The To Do List summary page allows you to view your pending checklist items. Checklist items are typically requests for documentation such as a transcript for an application or a tax return for financial aid.
- Click on the individual To Do item to view more information including contact information or instructions for the action needed to resolve the pending checklist item.
Where can I go to get help in person?
- Staff are available to assist with MyCSUEB in the Student Information Lobby and Learning Commons.
Do I need to enroll in classes at the time of my enrollment appointment?
- No. Your enrollment appointment is the entry point of when you are able to begin enrollment for the first/second enrollment period. Remember, your courses may be cancelled if fees are not paid by the due date.
Why am I having trouble enrolling in classes?
- Confirm you are registering within your enrollment appointment time.
- Confirm you do not have holds which will block you from enrolling.
- Click "add a class" select the correct term and appropriate class search criteria; then follow the prompts. If the class is already full, you may be prompted to add your name to the waitlist.
- Confirm the class does not have restrictions or require departmental permission. To view class prerequisites, or if the class requires permission, click on the class section hyperlink in the schedule of classes.
What are holds?
- A hold restricts you from using a service or enrolling in classes. The holds summary page will allow you to view holds that apply to you.
- Click on the individual hold item to view detailed information about the specific hold, including who to contact and instructions for removing the hold.
Why do I not see my grades?
- Grades are available at the end of each term.
What are the procedures for filing for graduation?
- In the Student Center, you may apply for graduation online. Complete the form. The graduation application fee will appear on your monthly billing statement.
How do I find my account balance?
- Login to MyCSUEB and click on the Student Center. Go to 'Finances' and click on 'Account Inquiry' to view your account balances.
How do I know if financial aid/scholarship has paid all of my fees?
- If financial aid money or a scholarship has paid your fees, you will see details under the 'Account Inquiry' link. Click on 'Account Details' and it will display a description of the activity on your account.
- If you have questions regarding the fees assessed on your account, contact the Student Financial Services at (510) 885-3767 or studentfinance@csueastbay.edu.
Where do I go to make an online payment?
- Payments can be made through the "Make a Payment" link found on the MyCSUEB home page. When you choose the "Make a Payment" link you will be directed to CASHNet SMARTPAY. You may choose your form of payment including check or credit card.
What happens if I don't pay my account?
- MyCSUEB Student Center guide
- Search Class Listings
- Use Section List by subject
- Use Online Registration
- How to enroll in the Direct Deposit Program
- Video tutorial - How to use MyCSUEB (for Applicants and Students)
- Video tutorial - How to Use the Student Center (add/drop/swap classes)
- Video tutorial - How to Manage Your School Finances (make a payment)
Faculty Help
Logging into MyCSUEB requires your personal NetID and password.
- If your NetID password is not working, reset it at www.csueastbay.edu/netid. If you believe your NetID and password are correct, contact (510) 885-2784 or reg@csueastbay.edu for assistance. If you do not have a NetID, please contact Human Resources at (510) 885-3634.
Why can't I log into MyCSUEB?
- Only faculty assigned to teach a class in an upcoming quarter will be able to log into MyCSUEB.
- Once you have been assigned to teach a class, your ability to utilize the MyCSUEB Faculty Center will be active.
- If you are assigned a class and cannot log into MyCSUEB, check with your department contact for scheduling classes. If he/she had scheduled you for a class and you still cannot log in, go to the Service Desk and submit a help ticket.
- Go to the Service Desk and submit a ticket. A response will be sent to you by e-mail as soon as possible.
Overview
Final grades must be entered into the MyCSUEB Faculty Center for submission into the Registrar's Office by the established deadline each quarter.
NAVIGATION
- Access MyCSUEB: http://my.csueastbay.edu
- Log in using your NetID and Password.
- At the MyCSUEB Faculty Home page, click the Faculty Center hyperlink.
FACULTY CENTER
- Choose the appropriate quarter.
- Click the Grade Roster icon for the class in which you want to enter grades.
Do not click on the icon in the Legend, but on the icon to the left of the class information.
![]()
GRADE ROSTER
![]() There is no other option but Final Grade.
There is no other option but Final Grade.
![]() You will not be able to change it from "Not Reviewed" to "Approved" until all grades are entered.
You will not be able to change it from "Not Reviewed" to "Approved" until all grades are entered.
- Enter the grade.
Available grades based on the student’s Grading Basis can be found in the Roster Grade drop down box. Click on the down arrow and choose the grade for the student. Go to the
 next student on your list.
Or you can apply the same grade to all students by using this:
![]()
- Select the grade and then click "add this grade to all students." This grade type will default to the grading basis for the first student on your grade roster.
- "Invalid" will appear for students that do not have the grade you choose. Example: the first student on your grade roster has a grading basis of Letter Grade and any student that has signed up on a credit no/credit basis will return an "invalid" grade.
- Simply go to the student with the "invalid" grade, click on the drop down menu for that student and enter the appropriate grade.
NOTE: When entering a grade of WU, the system requires the student's last date of attendance, if unknown the system will default the date to the census date for the term. If you know the last date of attendance please update the date accordingly.
- Once you have entered a grade of "WU" you must click SAVE, to save the date
- Click SAVE at the bottom of the page when you have entered your grades. You do not have to enter all of your grading at once. You can save your entries and complete it later. You will receive this warning message whenever you save the roster in Not Reviewed status.

- Click OK to close the window.
- Click SAVE again.
- When all grades have been entered, Change the Approval Status to "Approved."
You will receive the following warning if you have missed a grade:
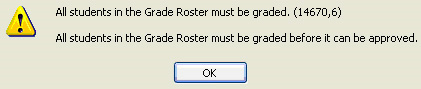
If you get this warning message:
- Click OK,
- Change the Approval Status back to "Not Reviewed",
- Go back and review your grade roster for missing grades,
- Enter the grades and process steps 6 – 9 again (remember to change the Approval Status back to "Approved".
Remember: You will not be allowed to change the final grade roster to Approved if there are grades missing.
- SAVE. You will receive the following message:
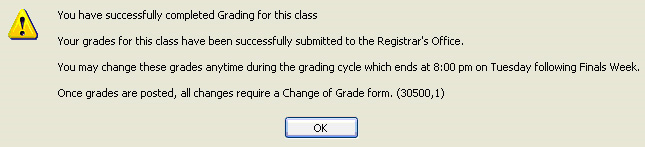
- Click OK and you are done.
CHANGING GRADES
After the grade posting deadline, all changes require a Change of Grade form.
Prior to the submission deadline, grades can be changed in the Faculty Center.
- Change the Approval Status to "Not Reviewed."
- Edit Grades.
- Change the Approval Status to "Approved."
- SAVE.
PRINTING
There are two ways you can view a printable version of your Grade Roster.
Option 1: Click the Printer Friendly Version button at the bottom of the page.
![]()
Use your browser’s printer option to print the roster.
Option 2: You can download your roster into MS Excel.
- Hold down the Ctrl key on your keyboard.
- Click the Download icon while holding on to the Ctrl key.

- Release the Ctrl key when you receive the File Download dialog box.
- In MS Excel, go to File > Print to print the roster.
How do I download and save my class and grade rosters?
- Open your class/grade roster. Hold down the Control Key while clicking on the download icon until the "Open – Save" dialog box appears.
- To save your roster, select the location on your computer where you want the file saved.
- Enter the File Name and remove any quotation marks in the default file name.
- Change File Type to MS Excel Workbook.
- Only faculty assigned to teach a class in an upcoming quarter will be able to log into MyCSUEB.
- Once you have been assigned to teach a class, your ability to utilize the MyCSUEB Faculty Center will be active.
- If you are assigned a class and cannot log into MyCSUEB, check with your department contact for scheduling classes. If he/she had scheduled you for a class and you still cannot log in, go to the MyCSUEB Help Desk and submit a help ticket.
- With your class roster selected; scroll to the end of the class roster and select 'PRINTER FRIENDLY VERSION'.
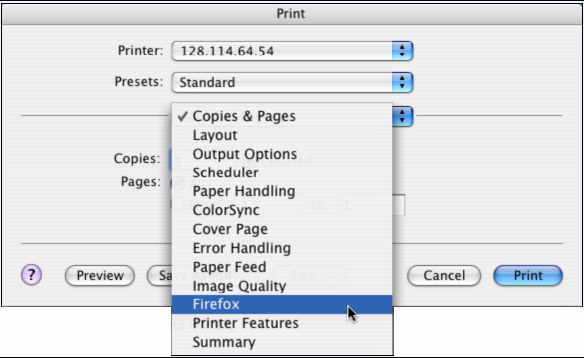
- Under the File menu, select Print. The print window appears. If you don't see the following options, expand the window using the triangle icon next to the printer drop down bar.
- Using the third from the top drop-down menu, select the browser you are using (Firefox).
- In the Frames section, click the radio button next to 'The selected frame'.
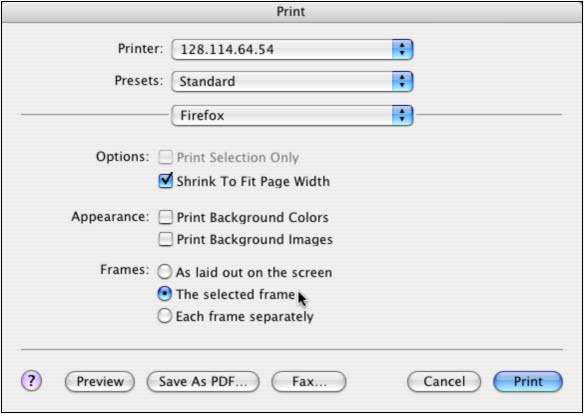
- Click Print.
Technical Help
- Firefox is the recommended browsers for use with MyCSUEB. Please use an up to date version of the browser, appropriate for your systems/device. There is no charge to install or use Firefox.
- Download Firefox
- Google Chrome user may experience a "page expired" message while using MyCSUEB. If you see "page expired" while using MyCSUEB on Google Chrome, please use Internet Explorer or Firefox.
- Internet Explorer users may experience pop-up security warnings when using MyCSUEB. If you see these warnings using IE, please see East Bay Solutions.
- Performance problems have been reported when using Firefox 4.0, with MyCSUEB. Please try a newer version of Firefox.
- When using MyCSUEB on Apple Mac computers, some versions of Safari may produce errors. If you experience difficulties using Safari, please install and use Firefox for Mac.
- Since PeopleSoft is a web-based system, you do not need any special software to access MyCSUEB when you are off campus. You can access the system from any computer that is connected to the Internet—and you do not need to use a VPN.
- Yes, simply click on the Return to MyCSUEB link.
- Instructions to clear cache here.
- When working on the Internet, your browser keeps a copy of the pages you visit (in cache) so that the next time you visit them, the browser can load them to your computer in less time.
- You should clear your cache regularly for two reasons. First, having a page in cache can sometimes cause a conflict with a page that you are trying to view. (If you suspect this may be the case, go into your browser options, clear the cache, close the browser, then re-open the browser and try again to view the page.) Secondly, having a large number of files in your cache will slow down your browser and take up space on your hard drive.
- PeopleSoft often uses pop up windows to display information you request. If your browser is set to block pop up windows—and most are set that way by default—then PeopleSoft will not work properly. If you click on a button or a link and nothing happens, you probably need to adjust your pop-up blocker settings. It is possible to leave your pop up blocker turned on (to protect you from intrusions from other Web sites), while adjusting it so that pop up windows open properly when you are in PeopleSoft. For example, you can allow pop ups for my.csueastbay.edu.
- If you are using Internet Explorer to access MyCSUEB, you may receive a security warning asking whether you want to display nonsecure items. This does not represent a security threat—the page you are trying to view is a secure page. There are several options for dealing with this warning such as allowing Secure and Non-Secure Items for specific information. Please see East Bay Solutions.
MyCSUEB uses cascading style sheets with fonts for visual layouts. Internet Explorer has a limited text resizing feature.
To resize text or ignore text size in Internet Explorer, you can do the following:
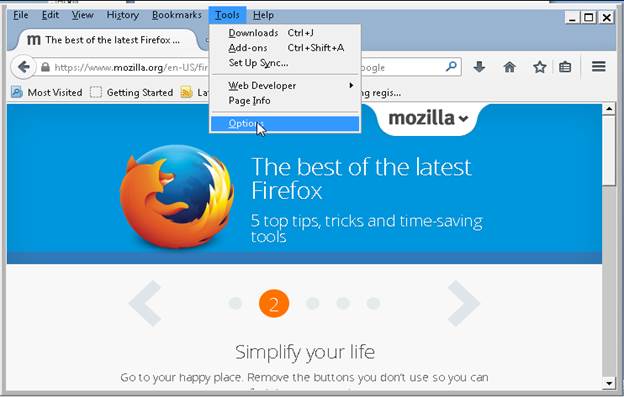
- Point to Tools on the menu bar.
- Point to Internet Options.
- Point to Accessibility.
- Choose "Ignore font sizes" and press OK (other options include "ignore colors" which helps users with visual impairments/color blindness).
- Now if you want to resize text, you can choose View menu, point to Text size, and choose your preferred size (e.g. Largest).
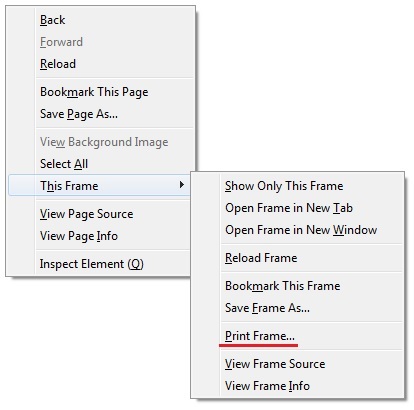
To print muliple page of a report using the FireFox browser, place the cursor over the report and right click, then select This Frame > Print Frame.
An alternative method to print more than one page with FireFox is to left mouse click, and select the desired print area
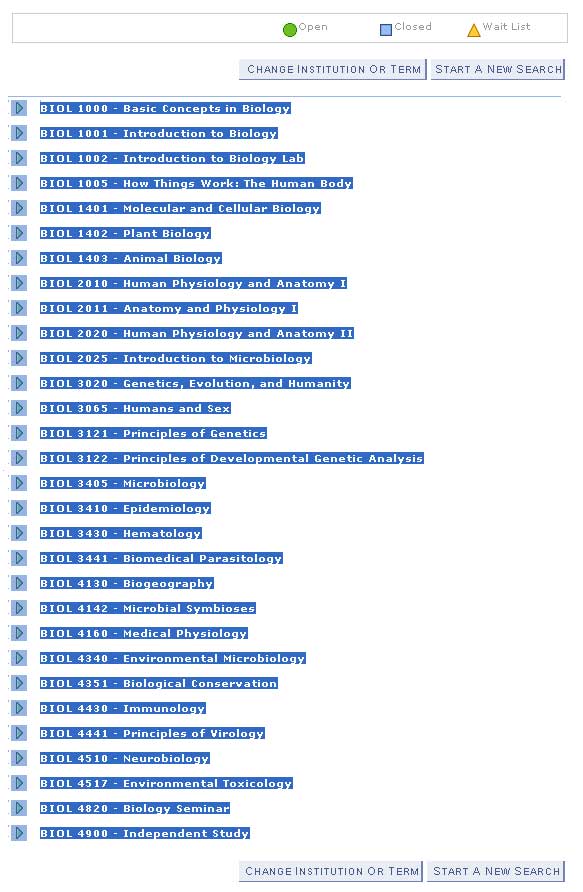
Select File > Print
Make sure 'The selected frame' is selected, then click OK.
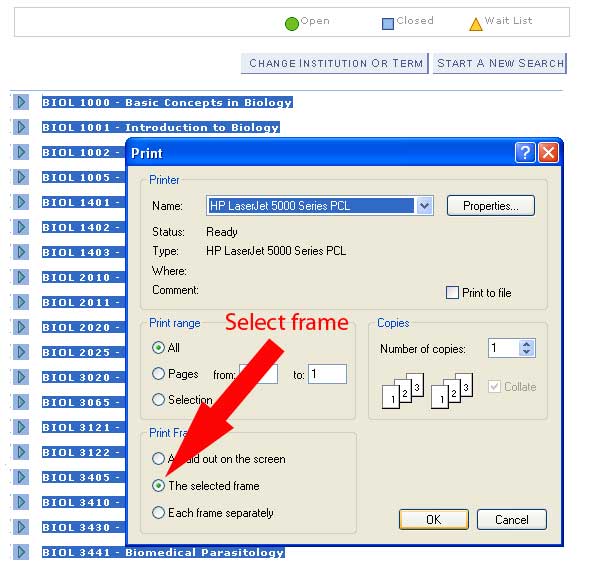
The output prints the entire selection.
Open the Firefox browser like below.
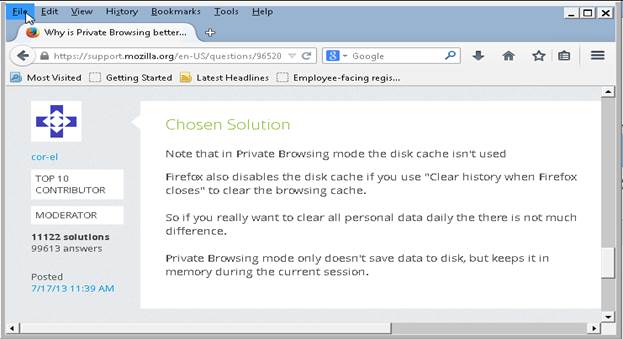
If you do not see MENU BAR like above, please click ALT key on your keypad to show the MENU BAR like below. Then, you can click on VIEW, go to TOOL BARS, and make sure MENU BAR is checked. In this way, MENU BAR will be on the top whenever you open Firefox browser.
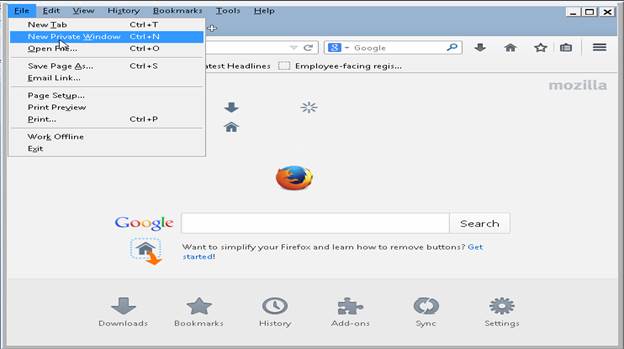
Click on FILE, go to NEW PRIVATE WINDOW like below. Then, in that Private window, go to my.csueastbay.edu to log in. In this way, the browser won't keep your cache.
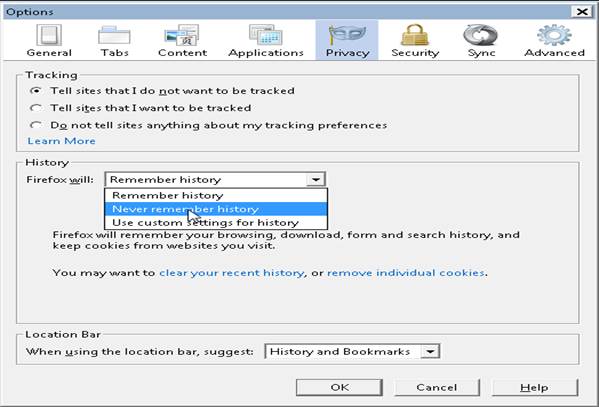
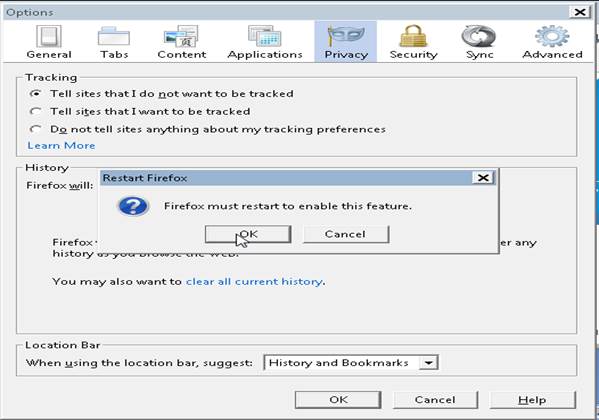
How to change setting to ‘Never Remember History’ in Firefox
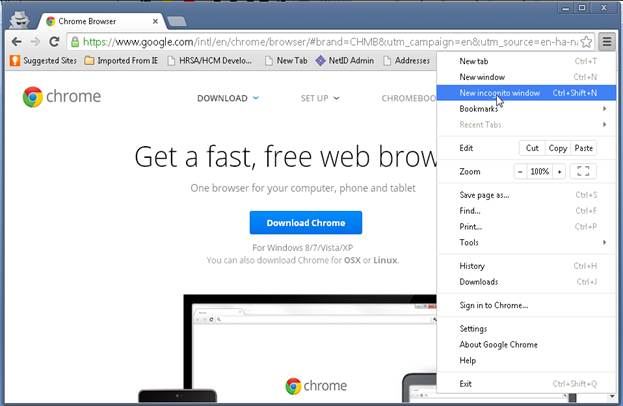
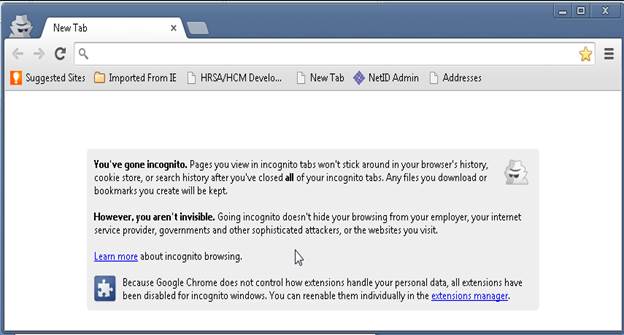
How to use New Incognito Window in Google Chrome:
Click on 'Customize & Control Google Chrome' icon on the top right most corner to go to 'New Incognito Window'.